
Enable call queues for call history
Allow your organization to view shared call queue calls in Call History
Overview
This guide explains how administrators can enable call queues so users in the organization can view these queue calls in Call History.
The setup is available in Settings → Microsoft 365 → Call History: Call Queues and is intended for administrators only.
The selected call queues are enabled organization-wide. After saving, all users in your organization see the corresponding queue filter in Call History.
Prerequisite: consent and Teams Administrator role
Two requirements must be met before available call queues can be loaded in the settings view:
- The required permissions for echo must be granted once for the Microsoft 365 tenant.
- The account currently signed in to Teams must have the Microsoft 365 Teams Administrator role.
If tenant consent is missing, echo shows a permission notice in the Call History: Call Queues section with a Grant Permissions button.
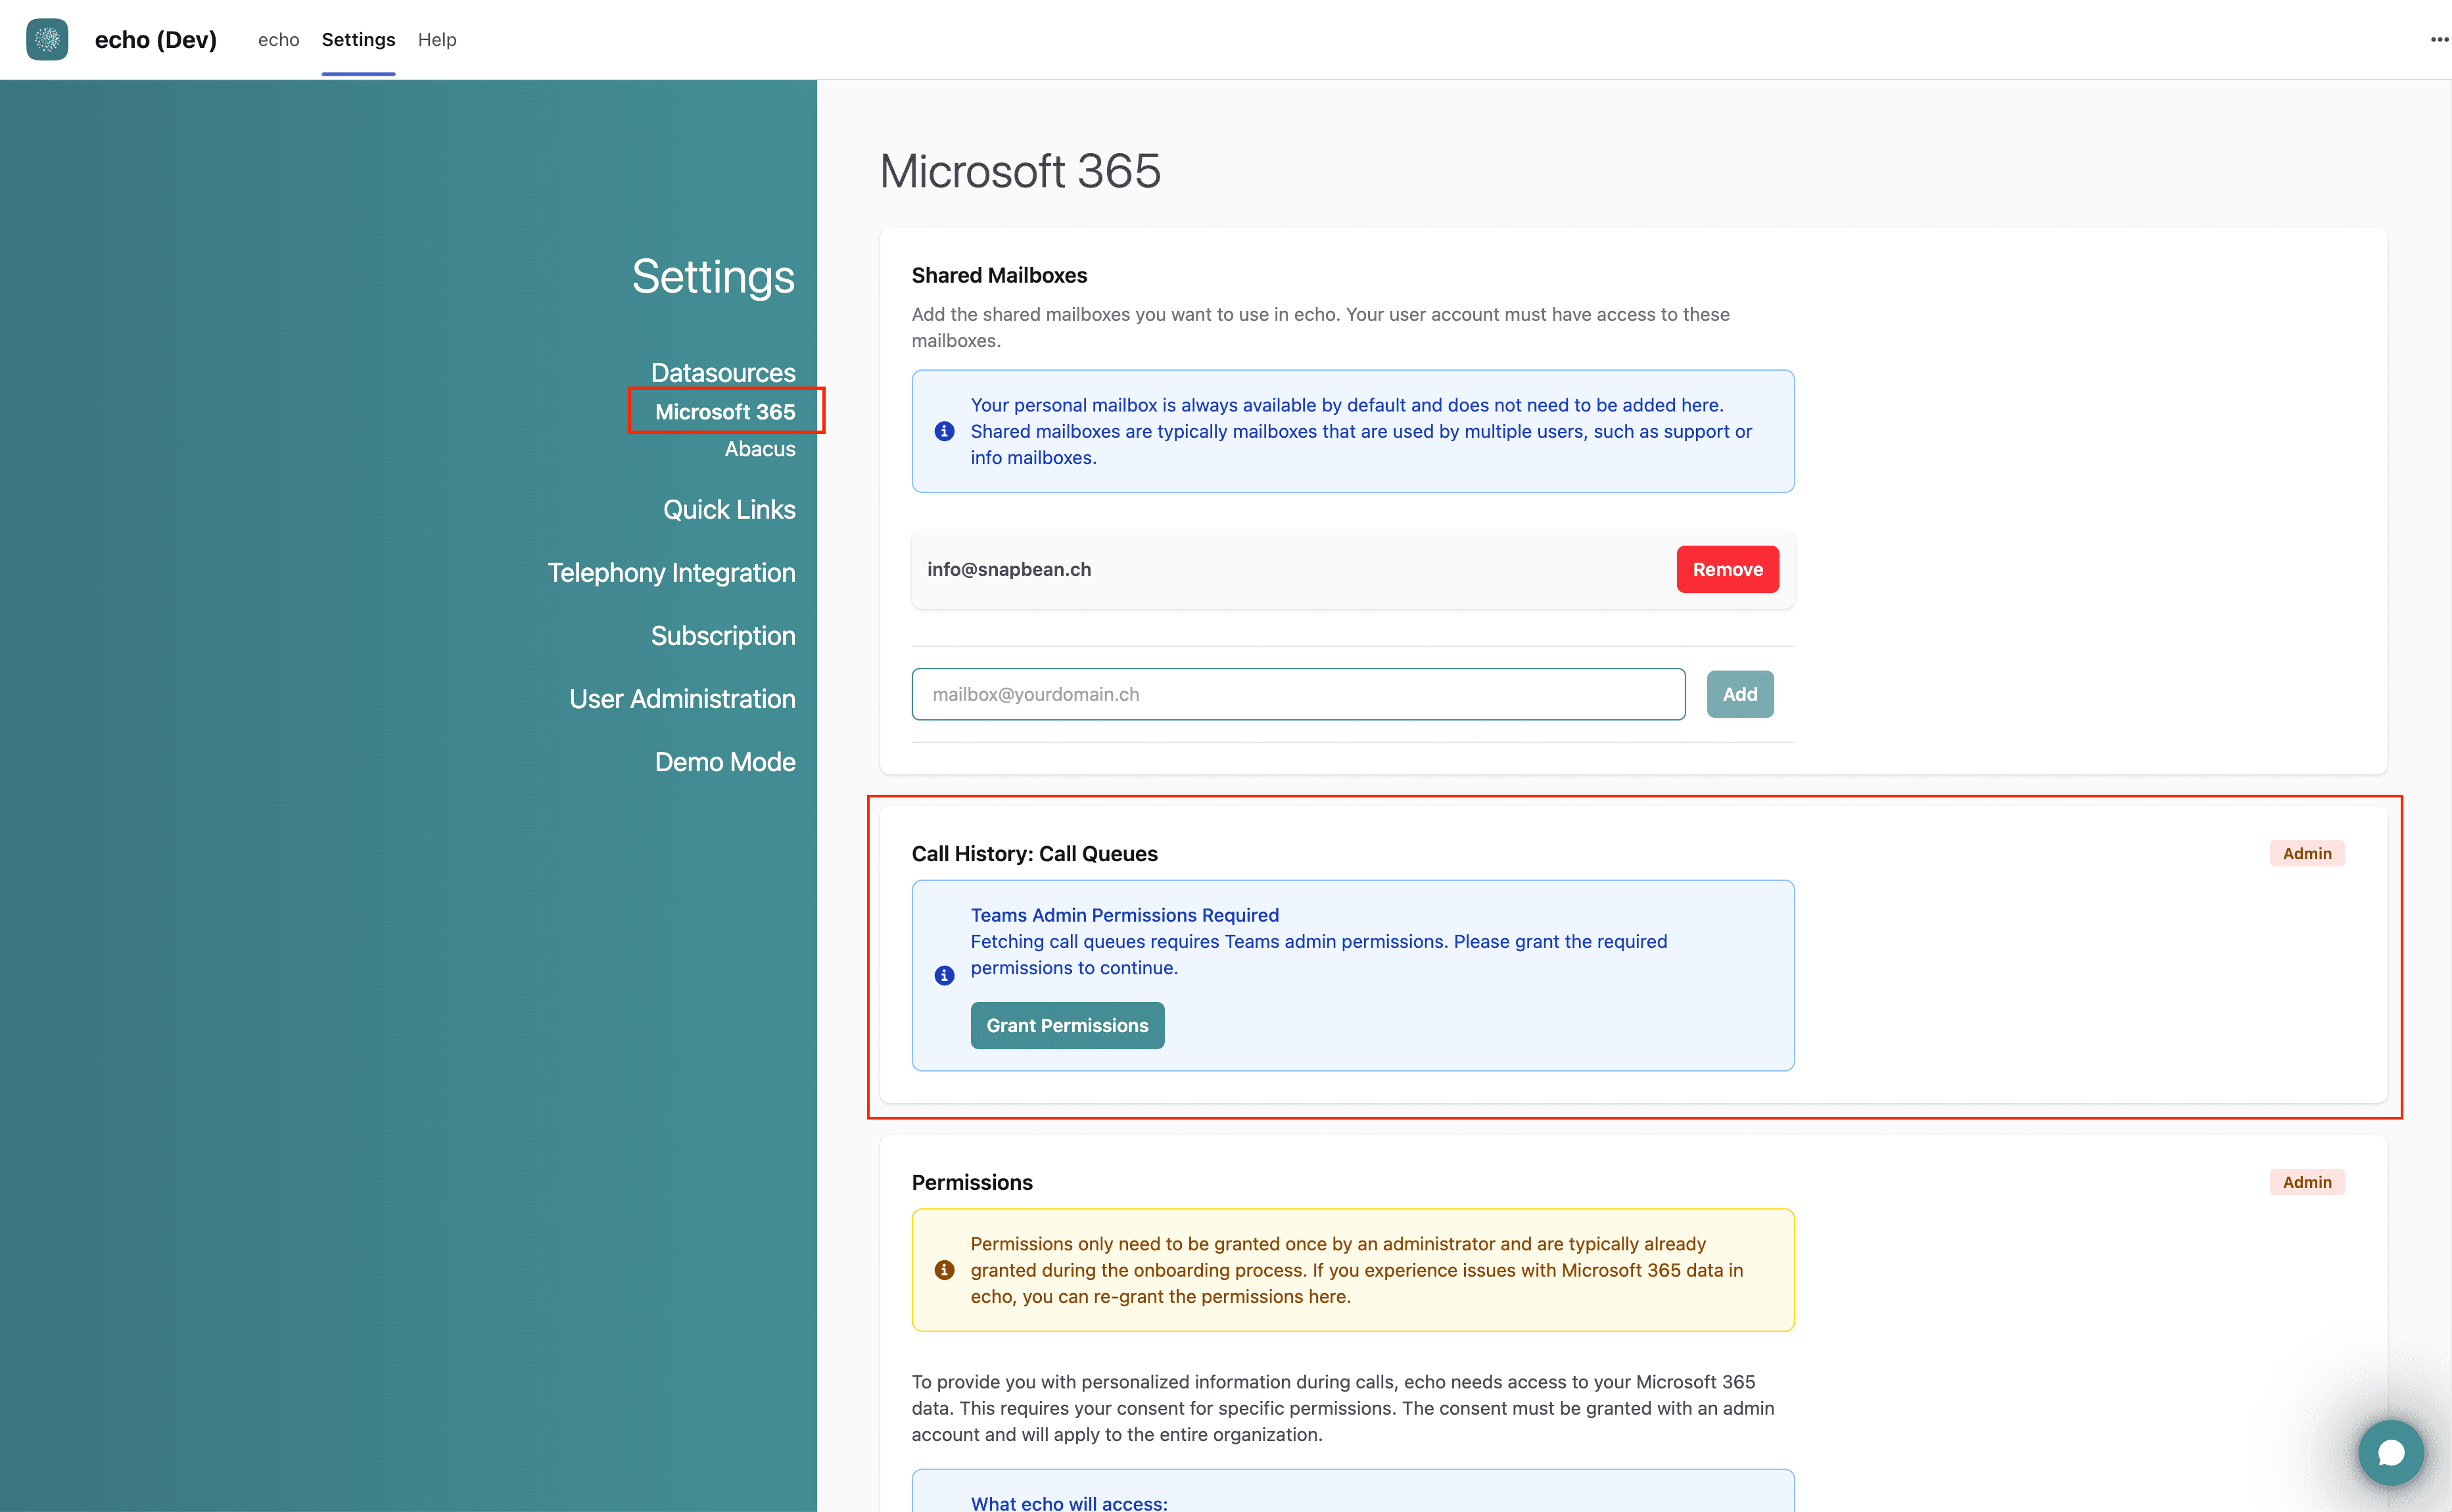
Click Grant Permissions. You are redirected to the Microsoft consent dialog. Sign in with an account that can grant the requested permissions and confirm with Accept.
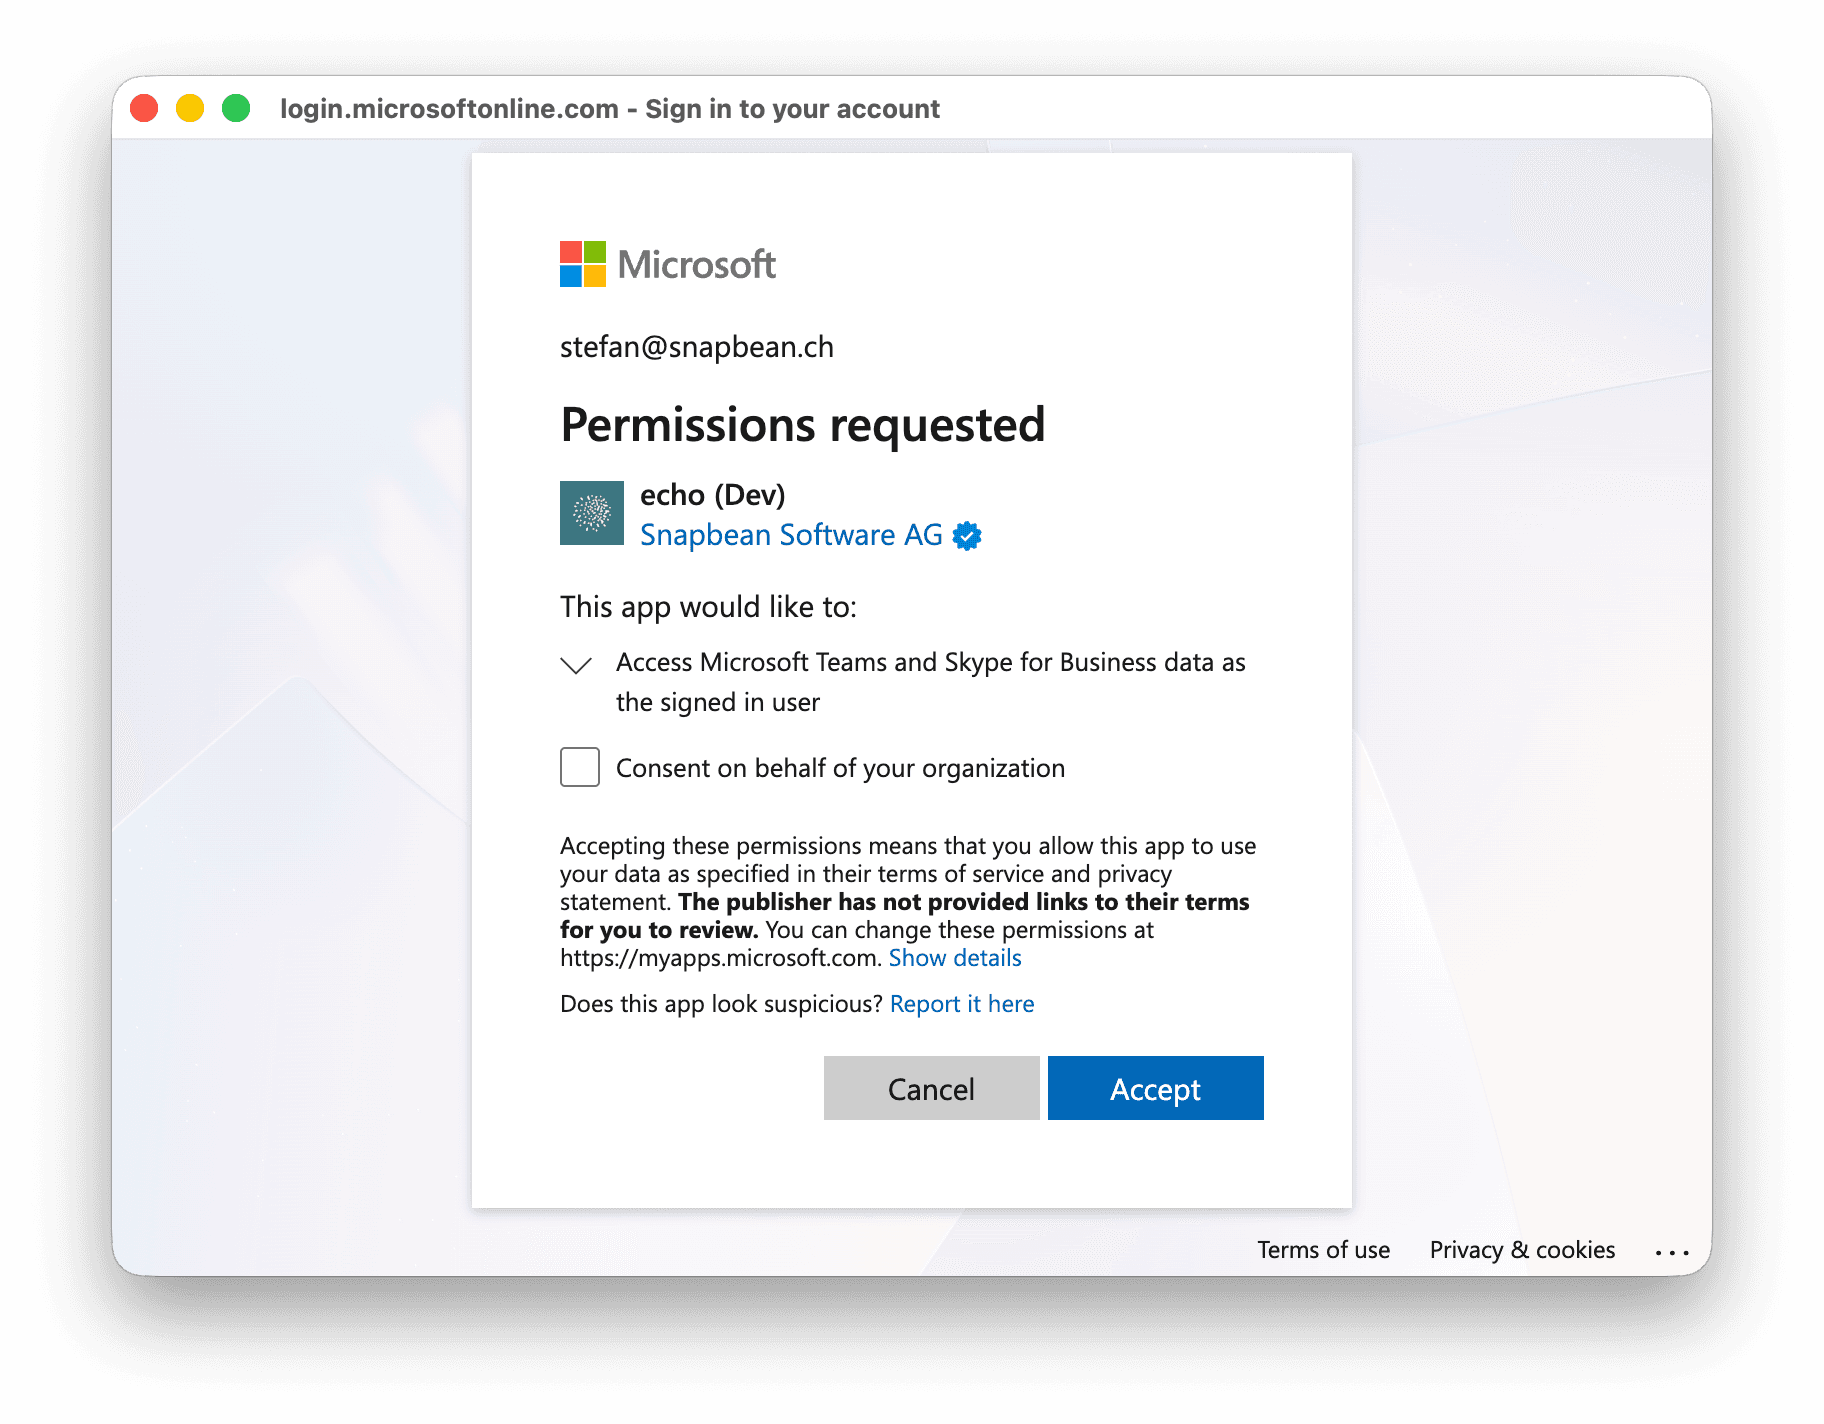
Only users with sufficient Microsoft 365 privileges can complete this consent. The consent applies to the tenant, but it does not replace the Teams Administrator role of the user currently signed in to Teams.
Missing Teams Administrator role
If permissions have already been granted but the current Teams account does not have the Teams Administrator role, echo still cannot load the list. The notice in the Call History: Call Queues section explains that the role must be assigned.
Ask a Microsoft 365 administrator to assign the Teams Administrator role to that account. Then sign in to Teams again and reopen Settings.
Alternative browser setup
If the Teams administrator does not have a Teams license, or you need to configure the selection with another Teams Administrator account, use the Open the alternative voice app setup page link in the notice.
The browser page can use a different Microsoft 365 account. If the initially selected account cannot access Teams voice apps, click Sign in with a different account and choose an account with the Teams Administrator role. The selected voice apps are still saved for the entire organization.
Enable call queues
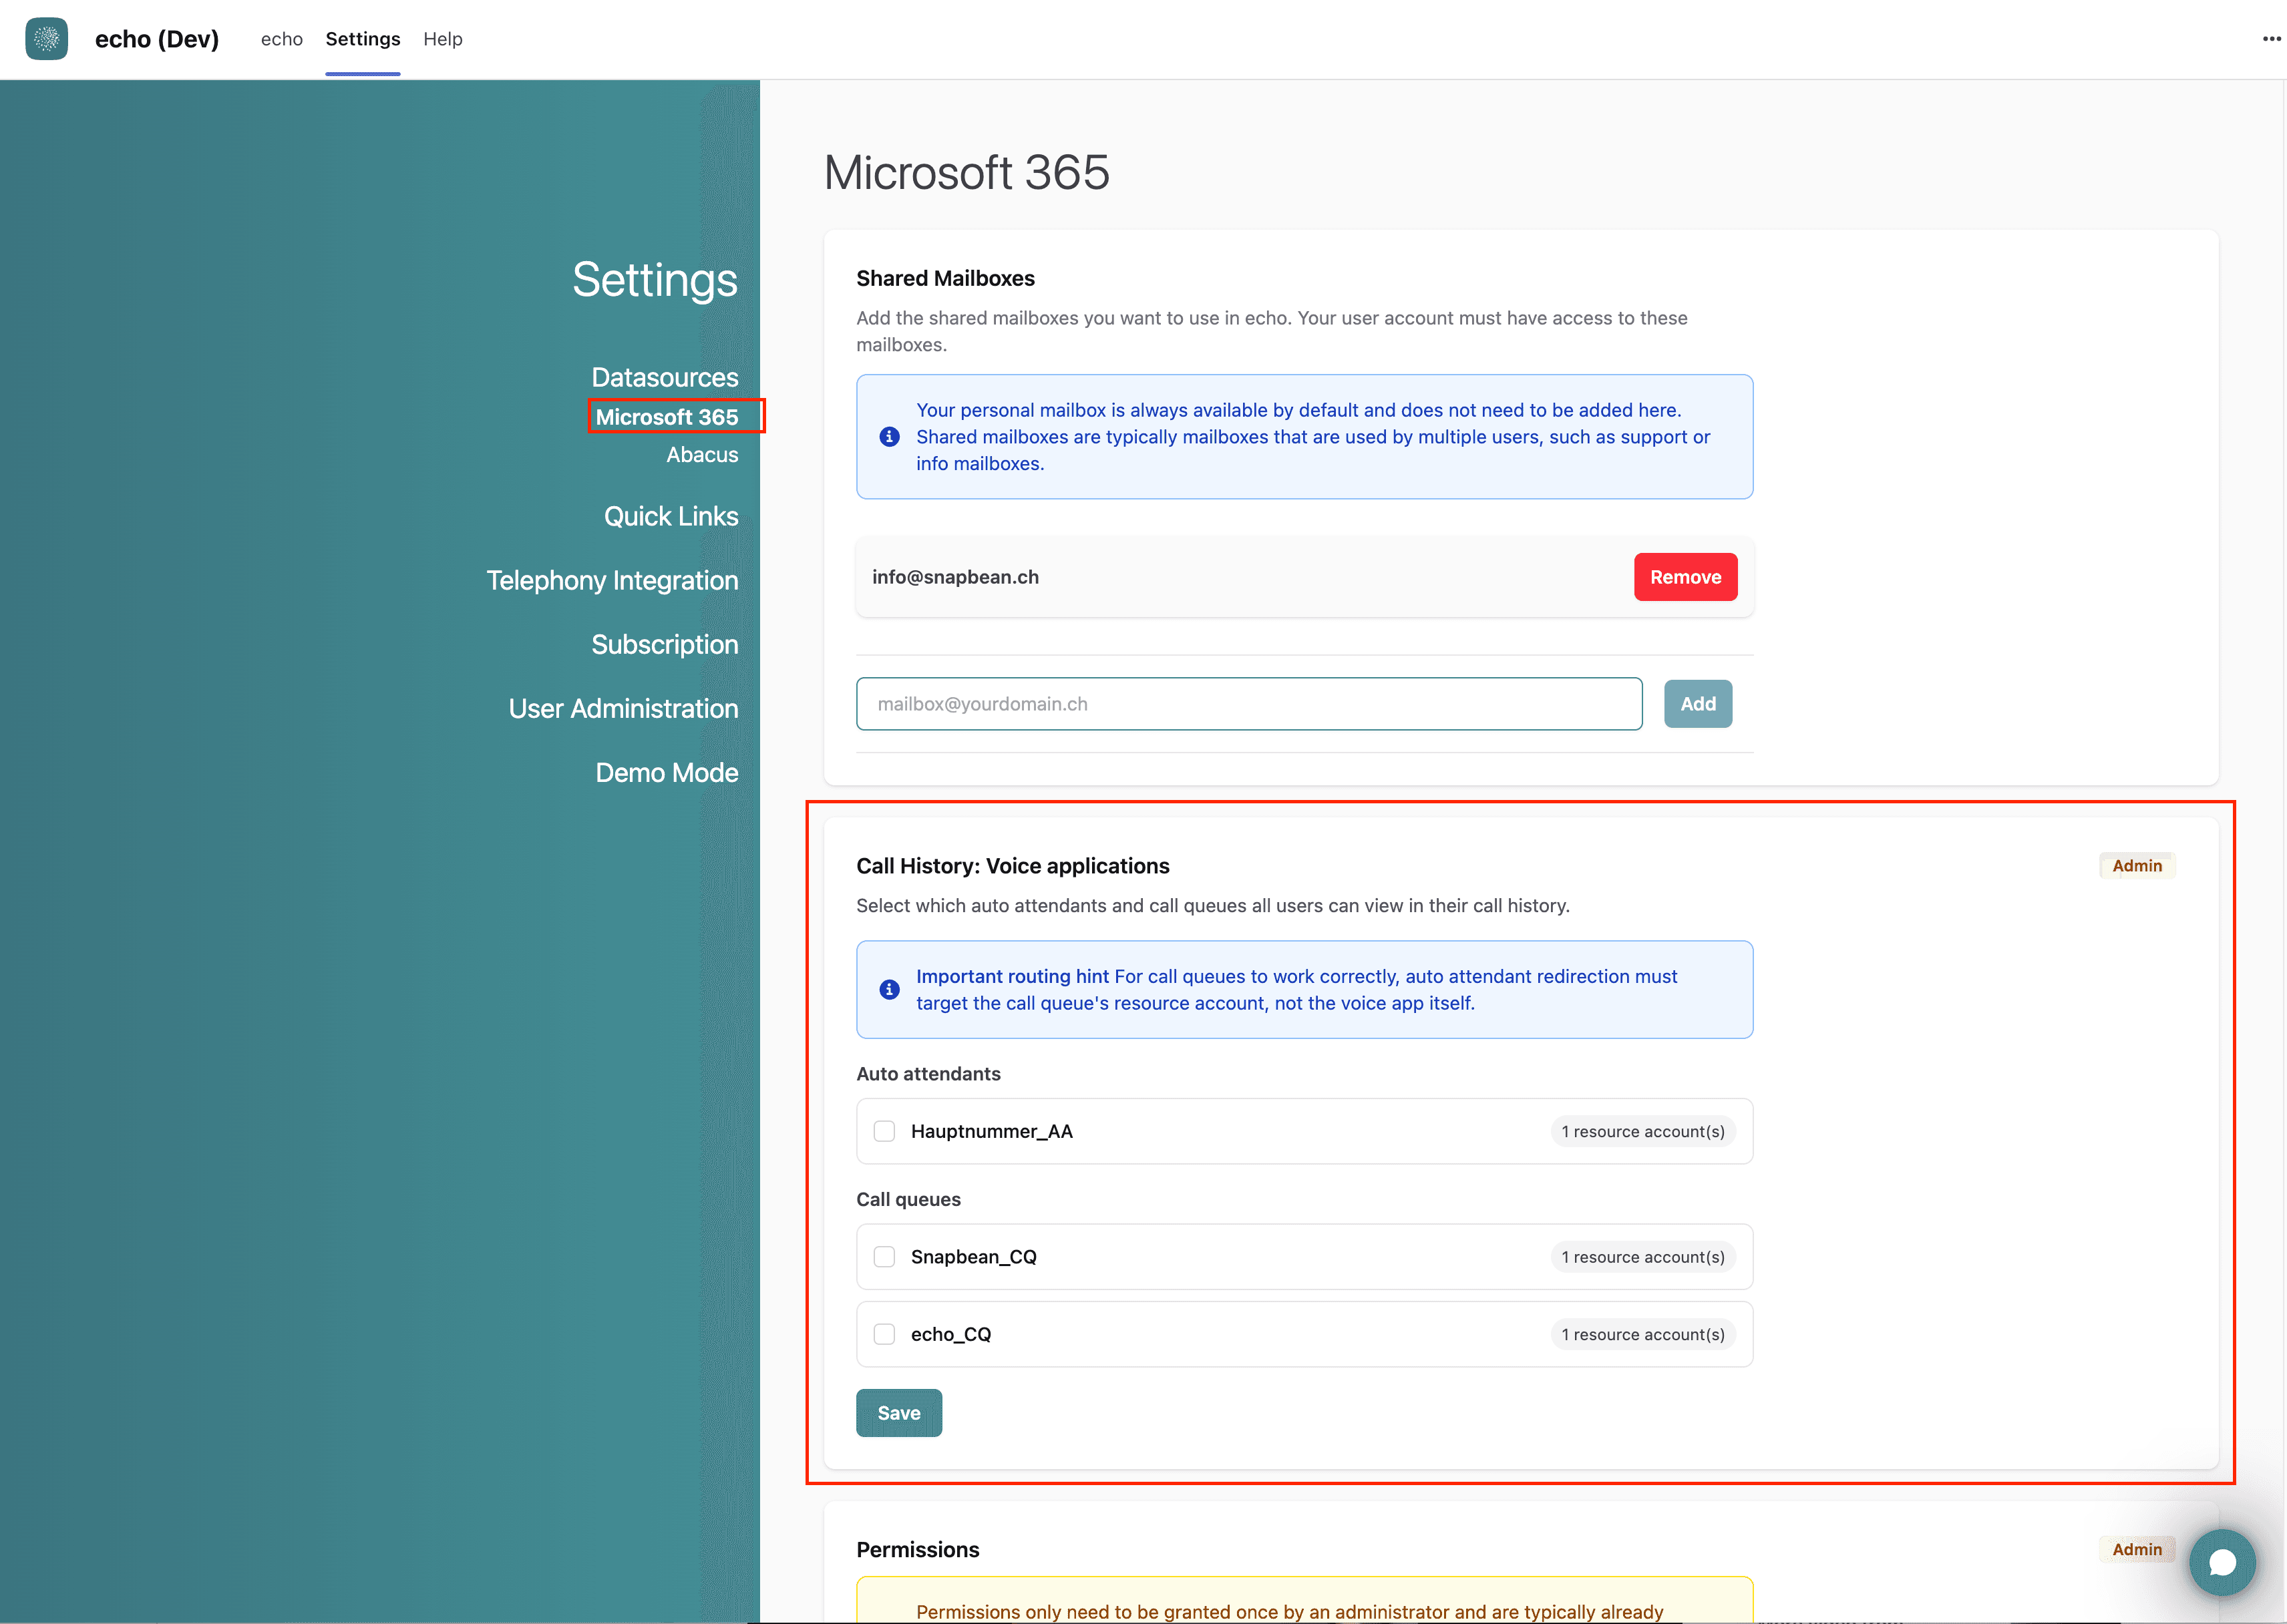
After permissions are granted and you are using an account with the Teams Administrator role, the Call History: Call Queues section shows the available auto attendants and call queues as selectable entries.
- Open Settings → Microsoft 365.
- In Call History: Call Queues, select the queues that should be visible in call history.
- Click Save.
Result for end users
After saving, users can open Call History and switch between their personal history and the enabled call queue histories.
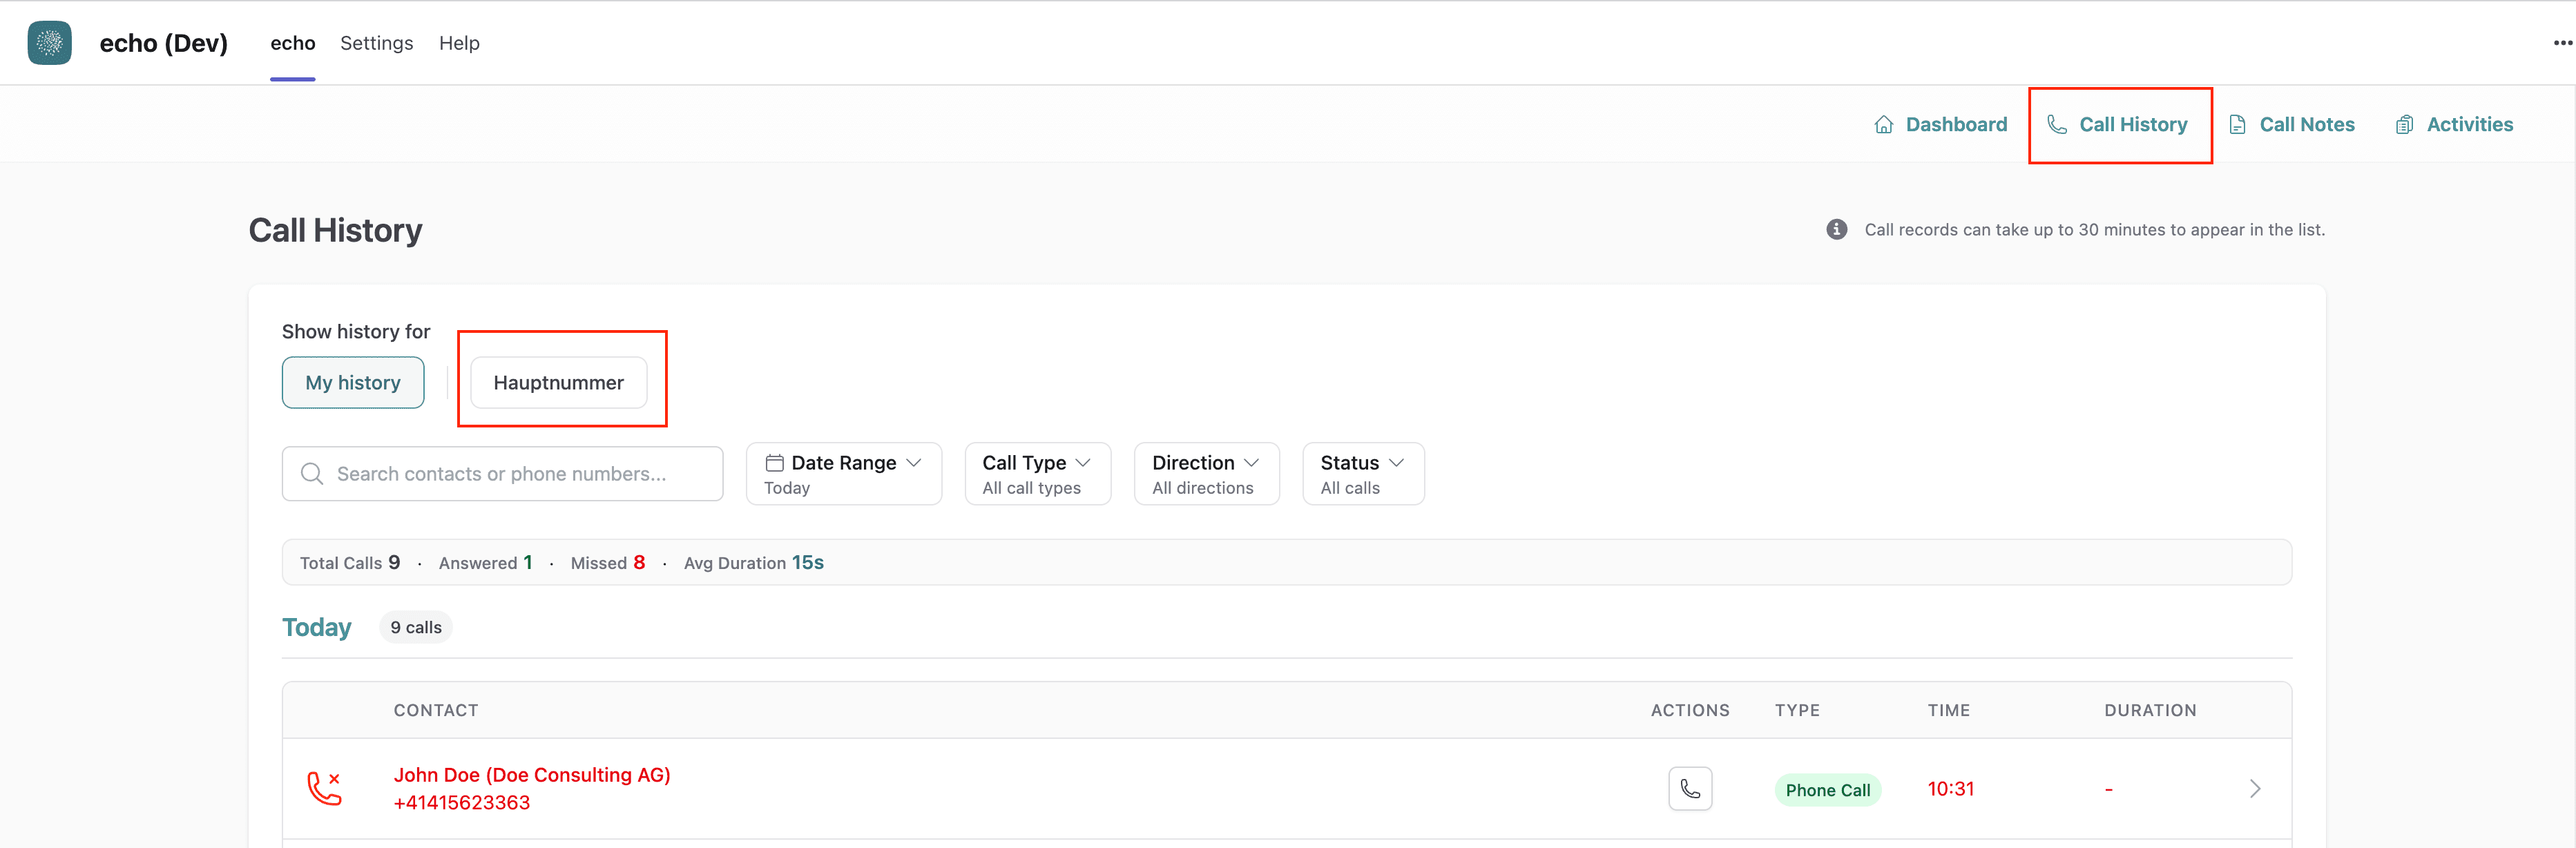
It can take a short time until newly available call records appear in the list, depending on Microsoft 365 data propagation.