
Installation and configuration guide
Part 1 – Initial setup for administrators
1 · Initial setup
This part is aimed at administrators and describes the one-time initial setup of echo in your Microsoft 365 environment. Setup takes place in two phases: first the echo app is added to Microsoft Teams (see the separate guide, linked under the prerequisites), then the onboarding wizard is completed. Once finished, echo is ready for organization-wide use and individual users can use the app.
Prerequisites
Before you start, make sure the following prerequisites are met:
| Prerequisite | Description |
|---|---|
| Access to Microsoft Teams | A Microsoft 365 account with access to Microsoft Teams (desktop, web or mobile app). |
| Right to add the app | Either the echo app is approved for installation in your organization (self-installation via the App Store) or you have the Teams Administrator role for central distribution via the Teams Admin Center. The exact procedure is described in the guide linked below this table. |
| Tenant administration | For the onboarding wizard you need administrator rights on your Microsoft 365 tenant in order to grant the required permissions organization-wide (admin consent). |
| Integrations | Credentials for the systems to be connected (e.g. CMI: API, STS and portal URL). |
| Windows client | A software distribution tool or access to the client computers in order to distribute the echo Windows client (required for caller identification). |
First step: Add the echo app to Microsoft Teams. You can find the step-by-step guide for both ways (Teams App Store and Teams Admin Center) here:
TAdd echo to Microsoft Teams · echo-Add-to-TeamsOption A: self-installation via the Teams App Store · Option B: central distribution via the Teams Admin Center.→Run the onboarding
Start onboarding
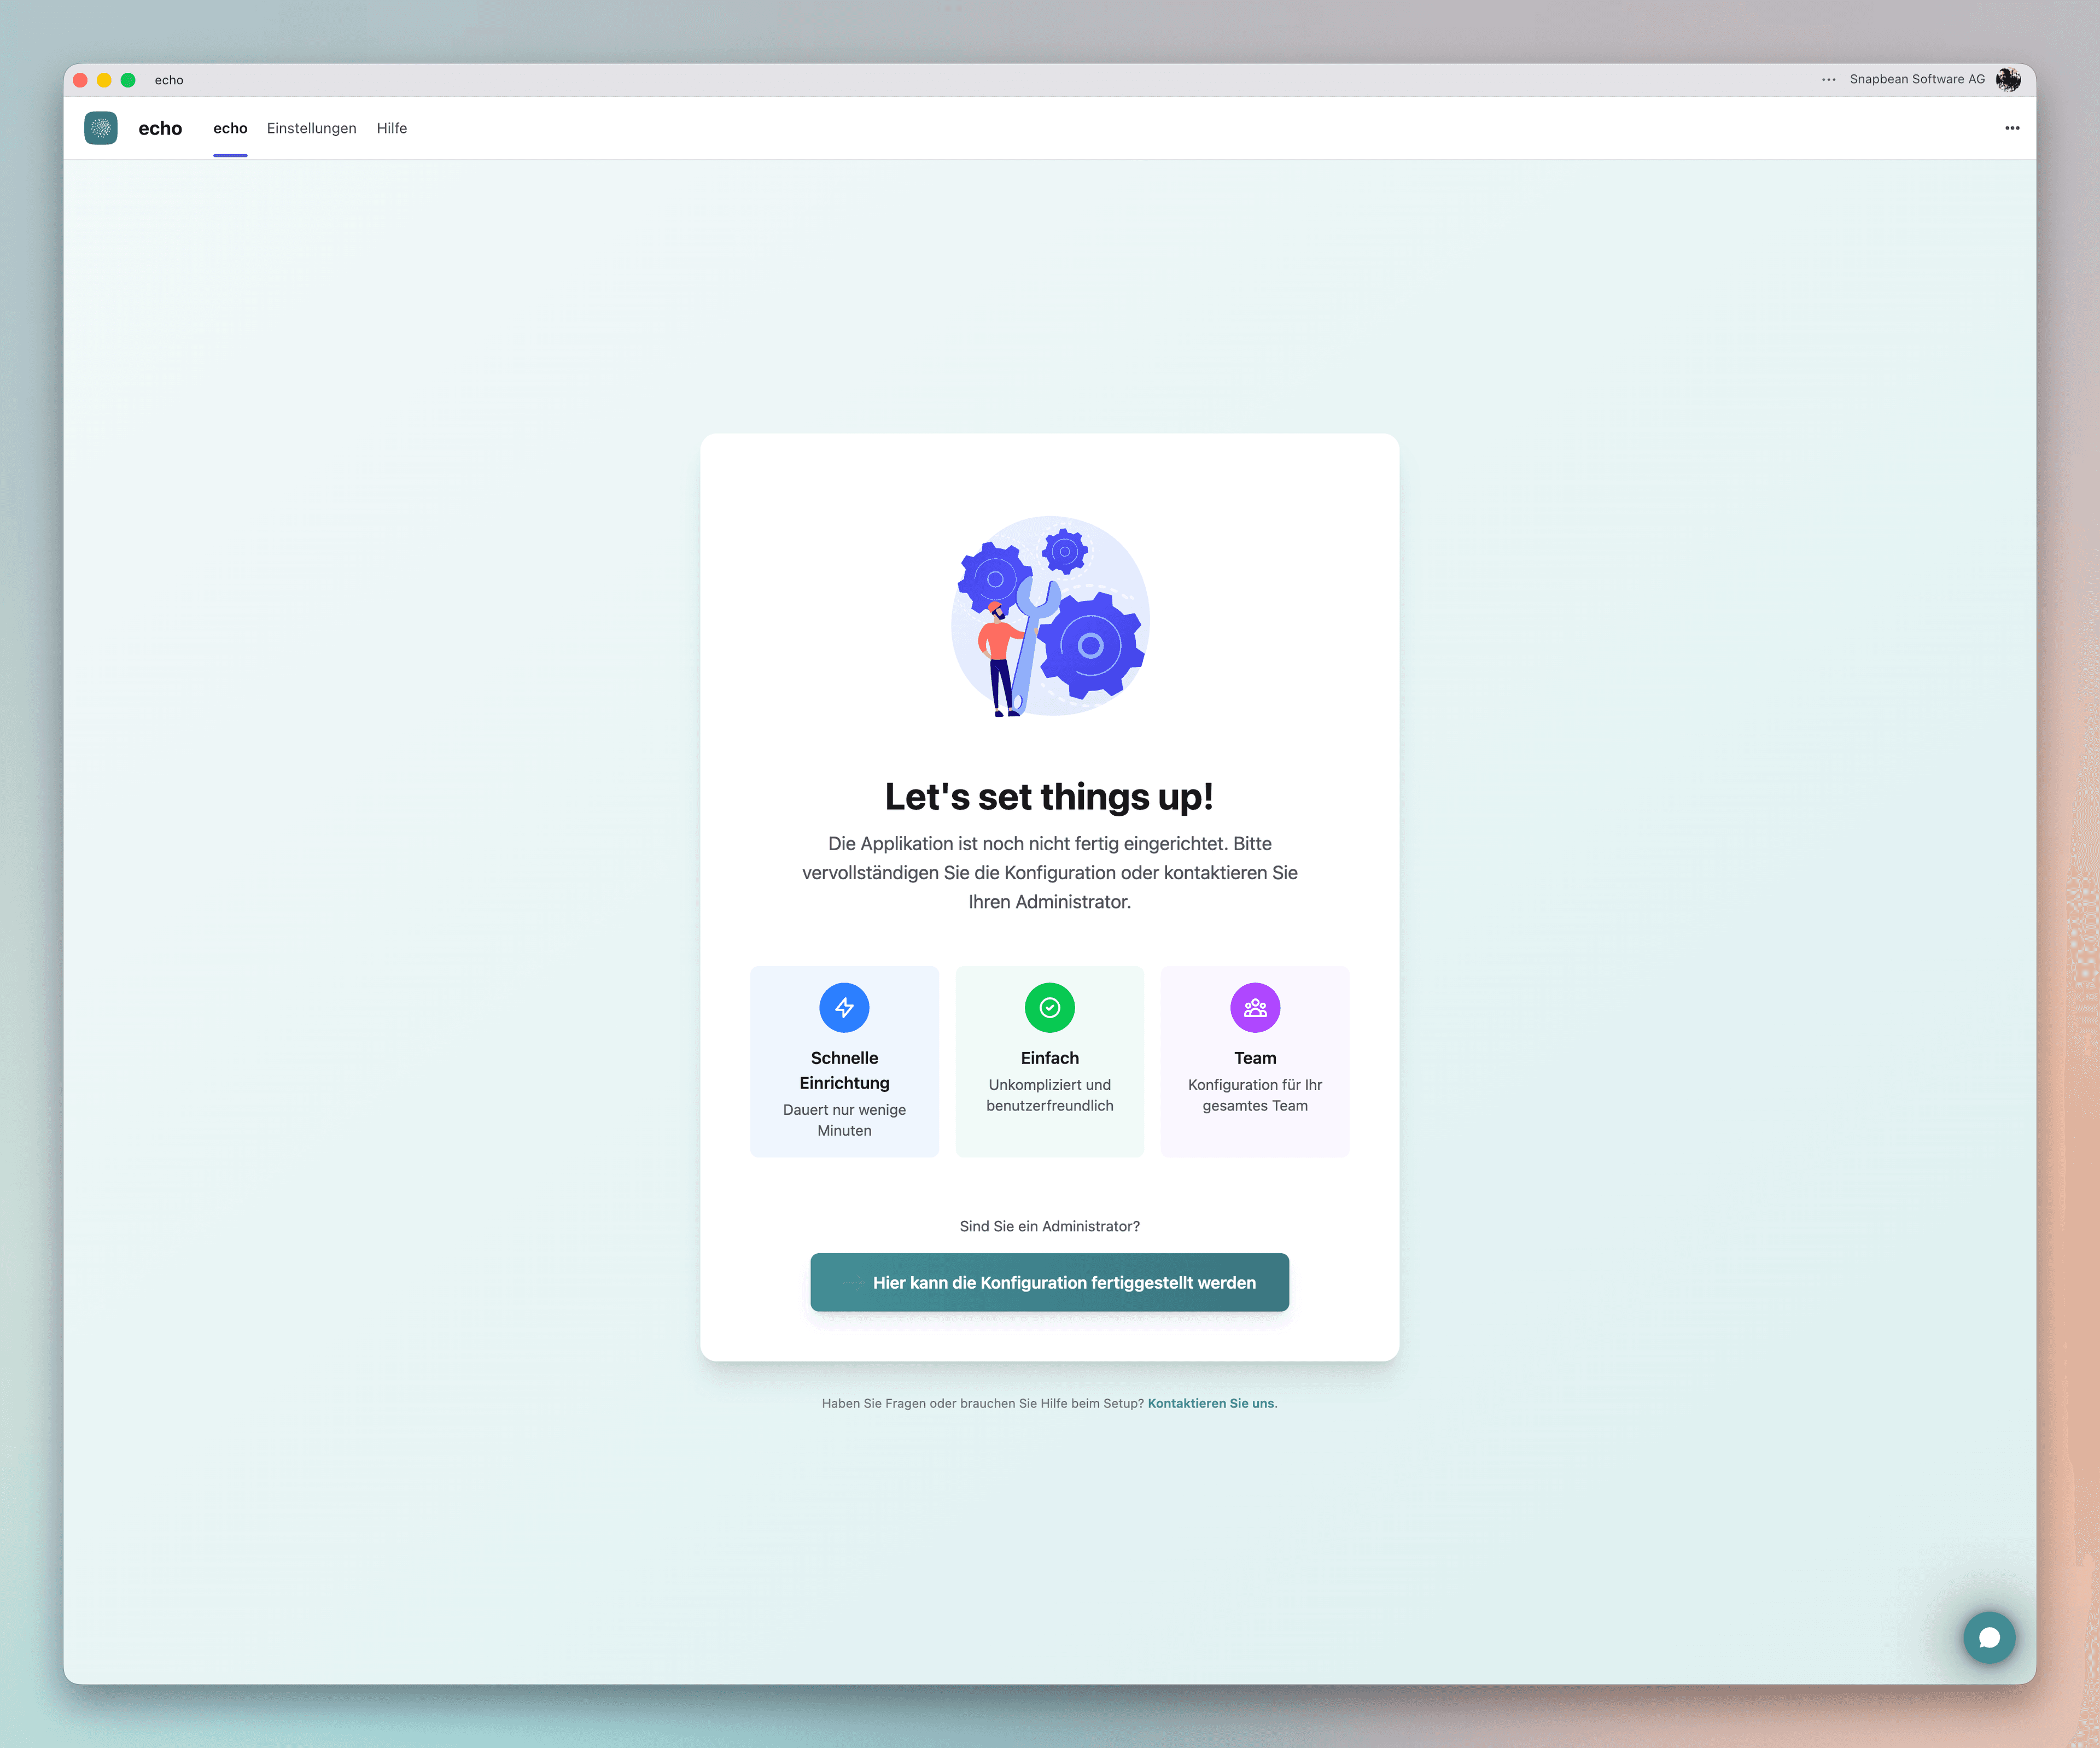
Open echo in Microsoft Teams. After adding the app, the start screen “Let’s set things up!” appears. echo points out that the application is not yet fully set up.
As an administrator, under “Are you an administrator?” click “The configuration can be completed here” to start the setup wizard.
Select integrations
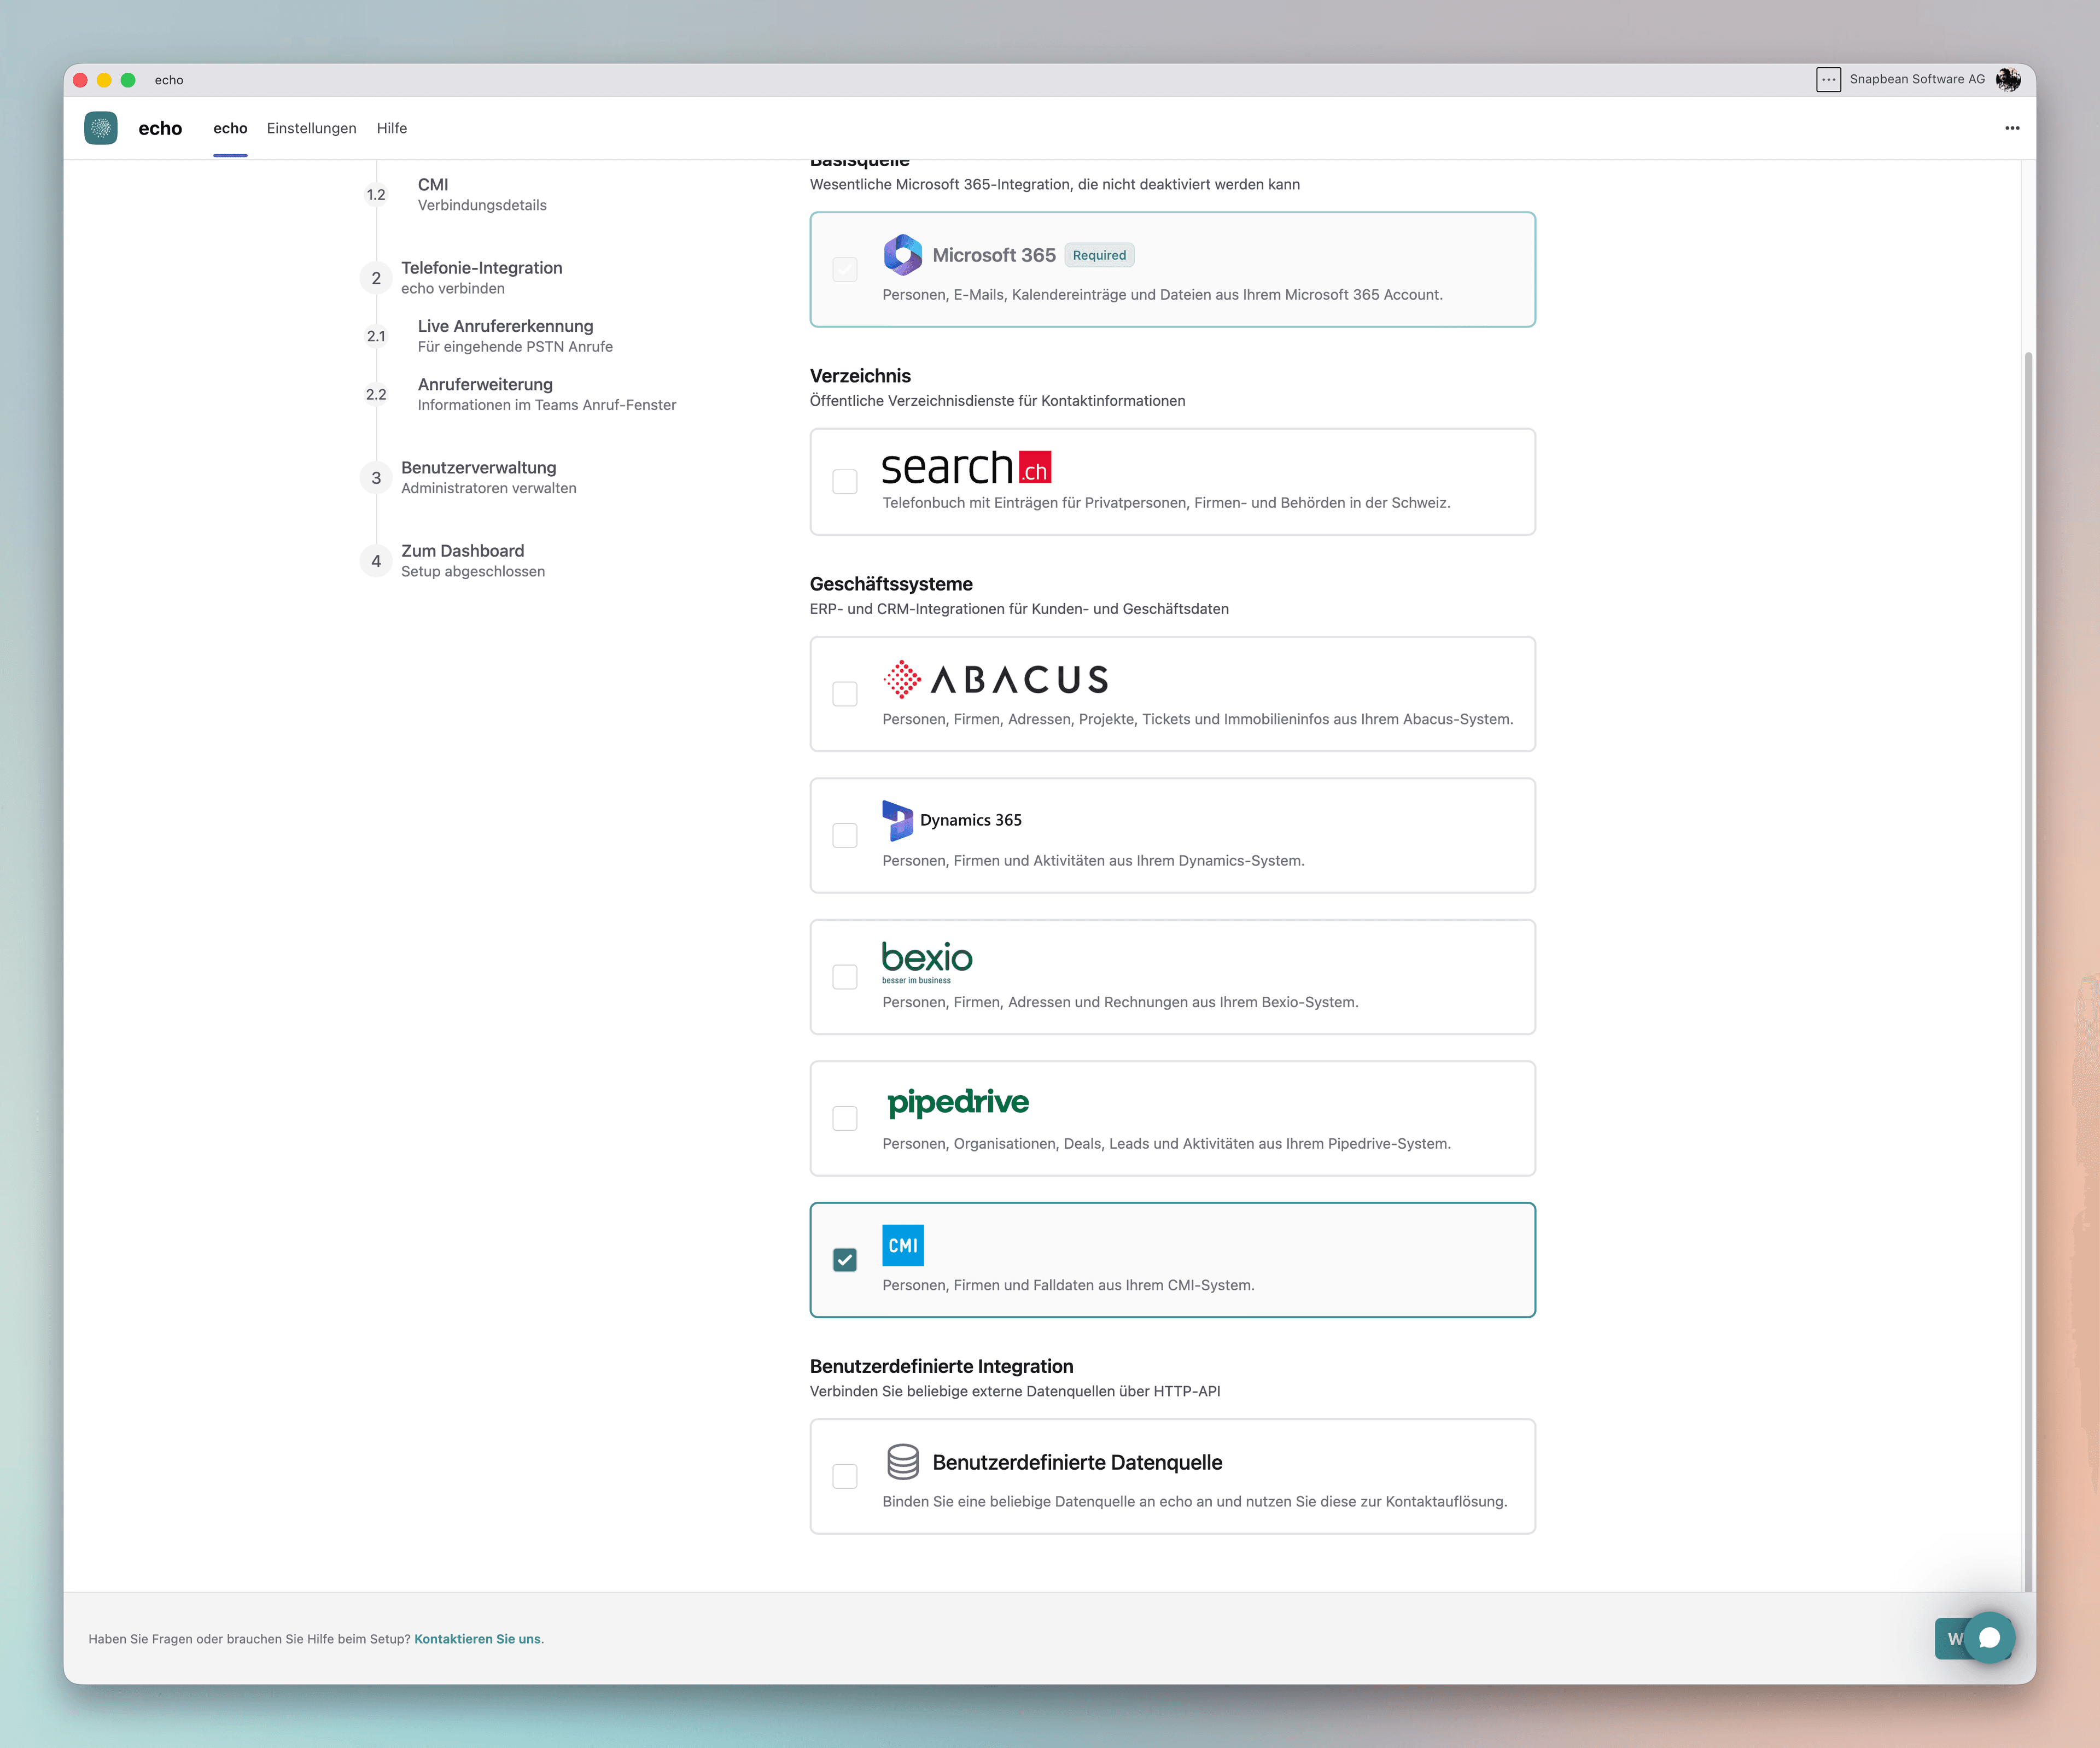
Select the integrations you want to connect to echo. echo uses these integrations to show matching contact information for incoming calls. The options include:
- Microsoft 365 – people, emails, calendar entries and files from your Microsoft 365 account (required).
- Directory (search.ch) – public directory for contact information of individuals and companies in Switzerland.
- Business systems – ERP/CRM integrations such as ABACUS, Dynamics 365, bexio, Pipedrive or CMI.
- Custom integration – connect any external system via an HTTP API.
Activate the desired integrations by clicking the respective tile.
Grant Microsoft 365 permissions (admin consent)
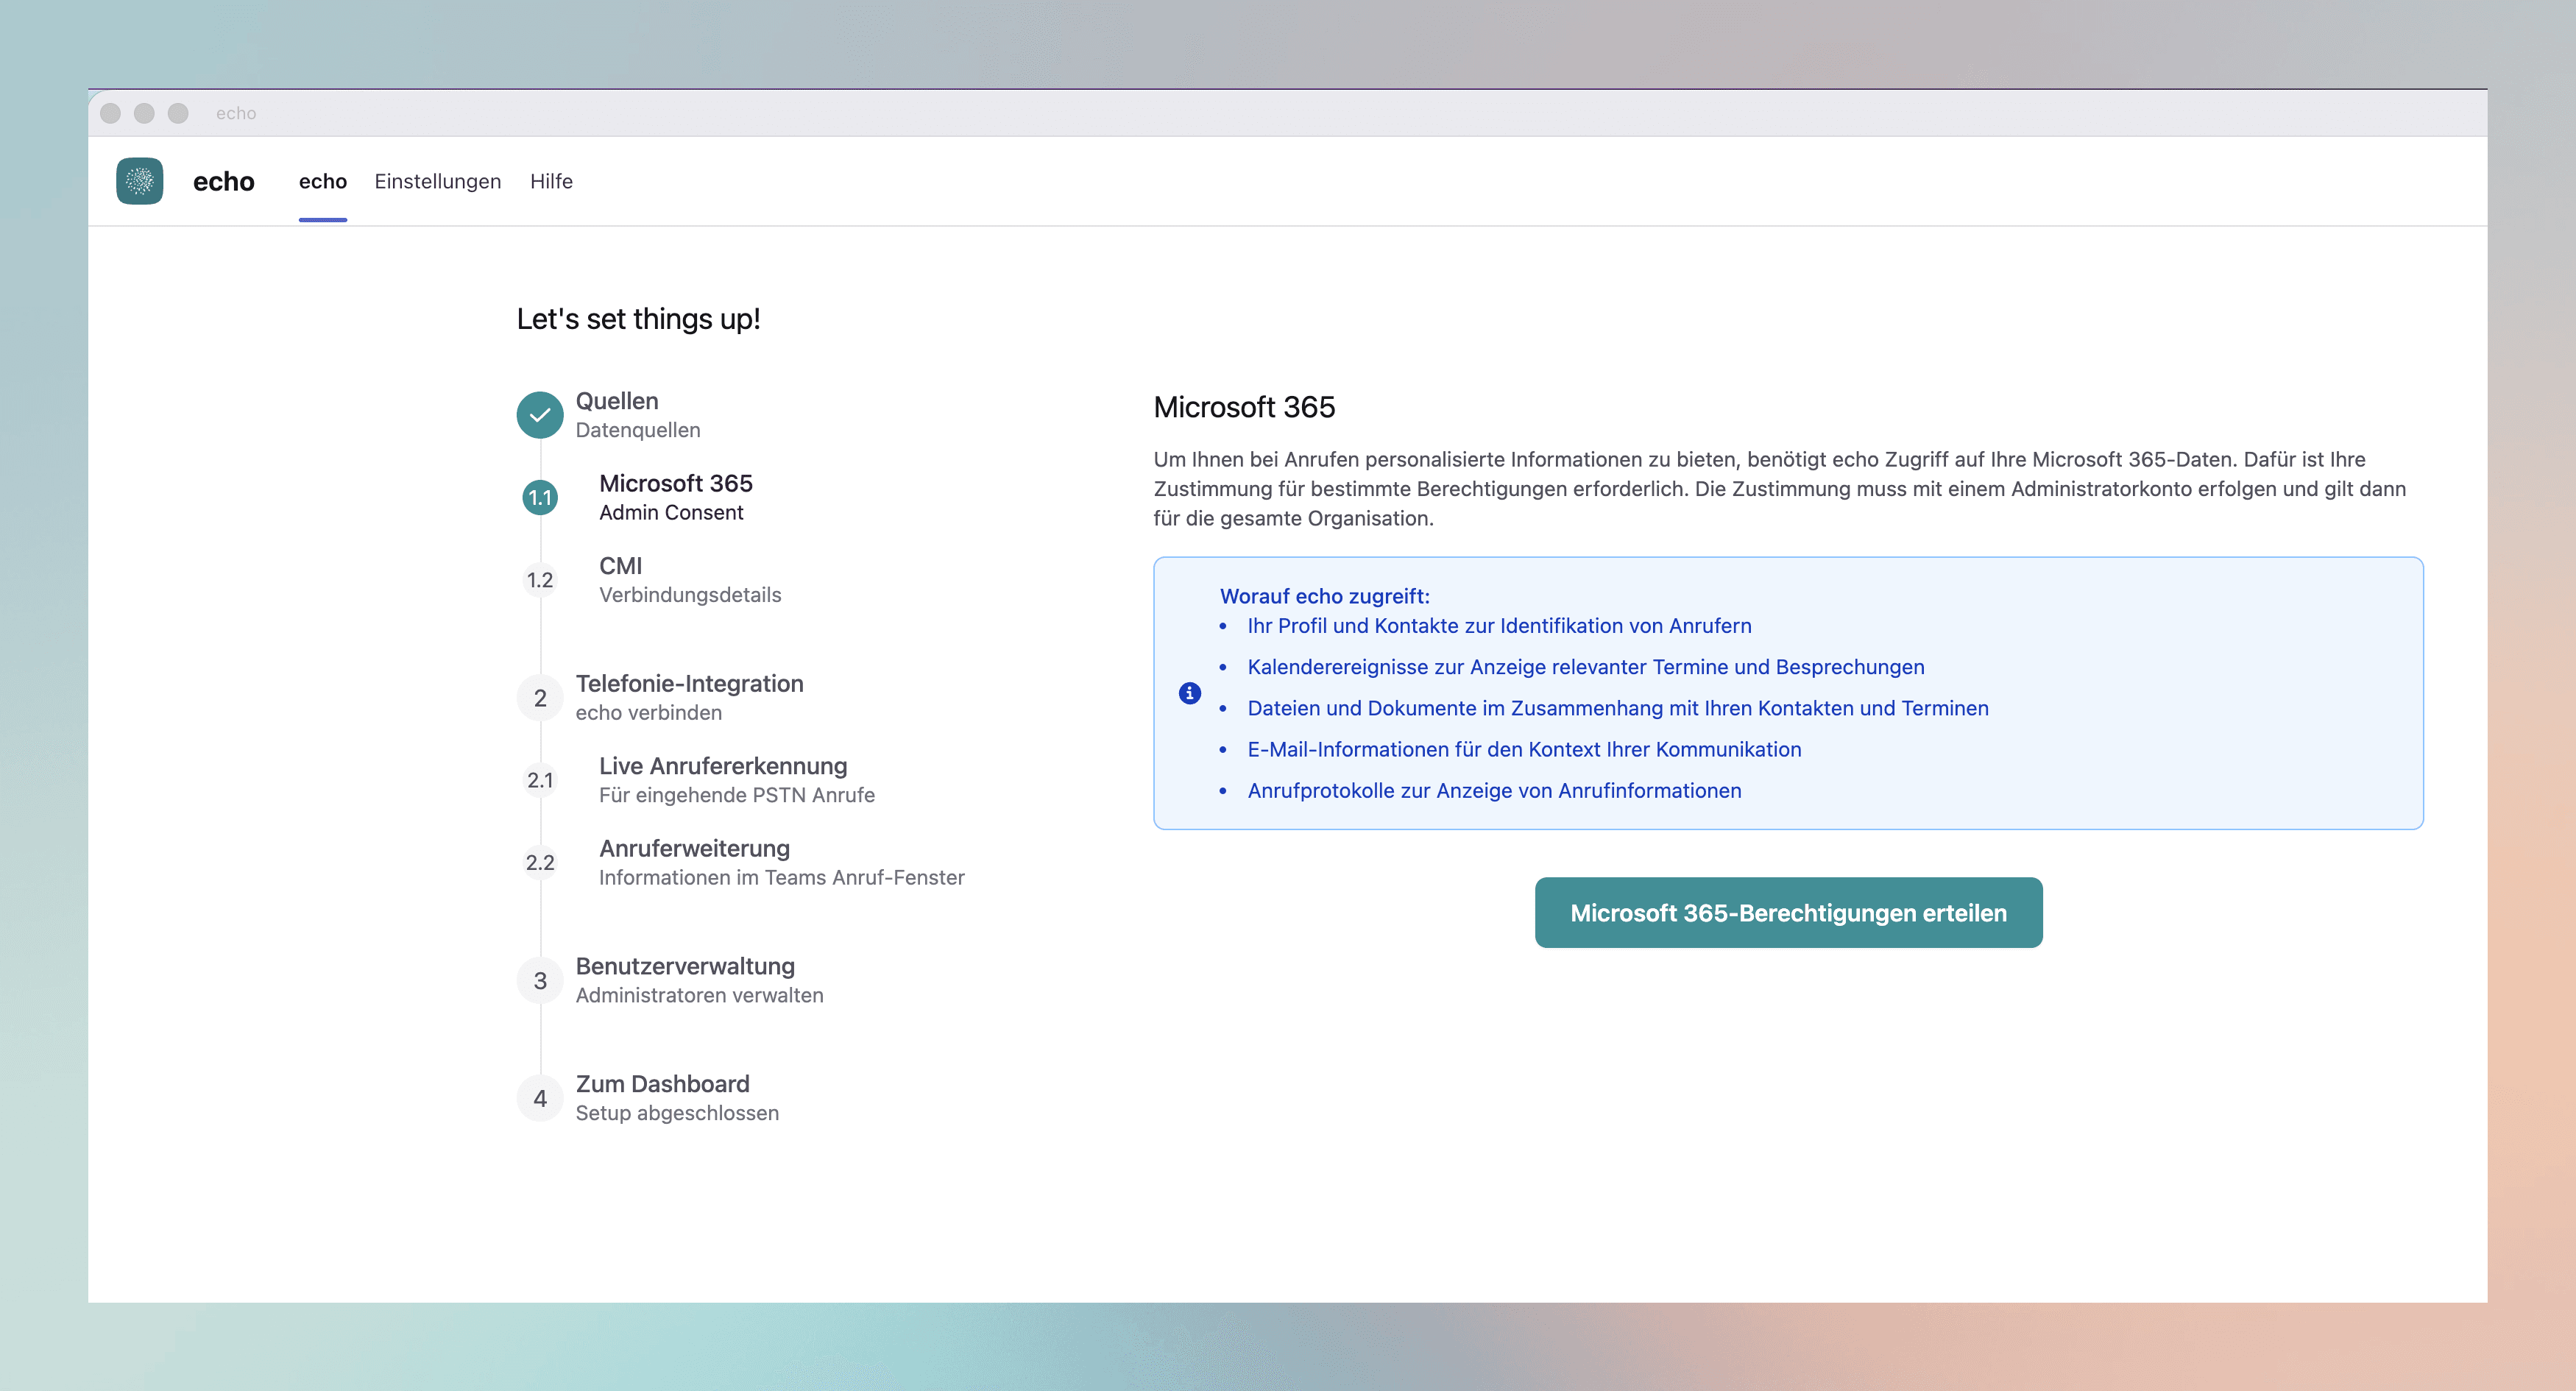
In order for echo to show personalized information about callers, it needs access to certain Microsoft 365 data. Consent must be given with an administrator account and then applies to the entire organization.
echo accesses the following data:
- Profile and contacts to identify callers
- Calendar events to display relevant appointments and meetings
- Files and documents related to contacts and appointments
- Email information for the context of your communication
- Call logs to display call information
Click “Grant Microsoft 365 permissions”.
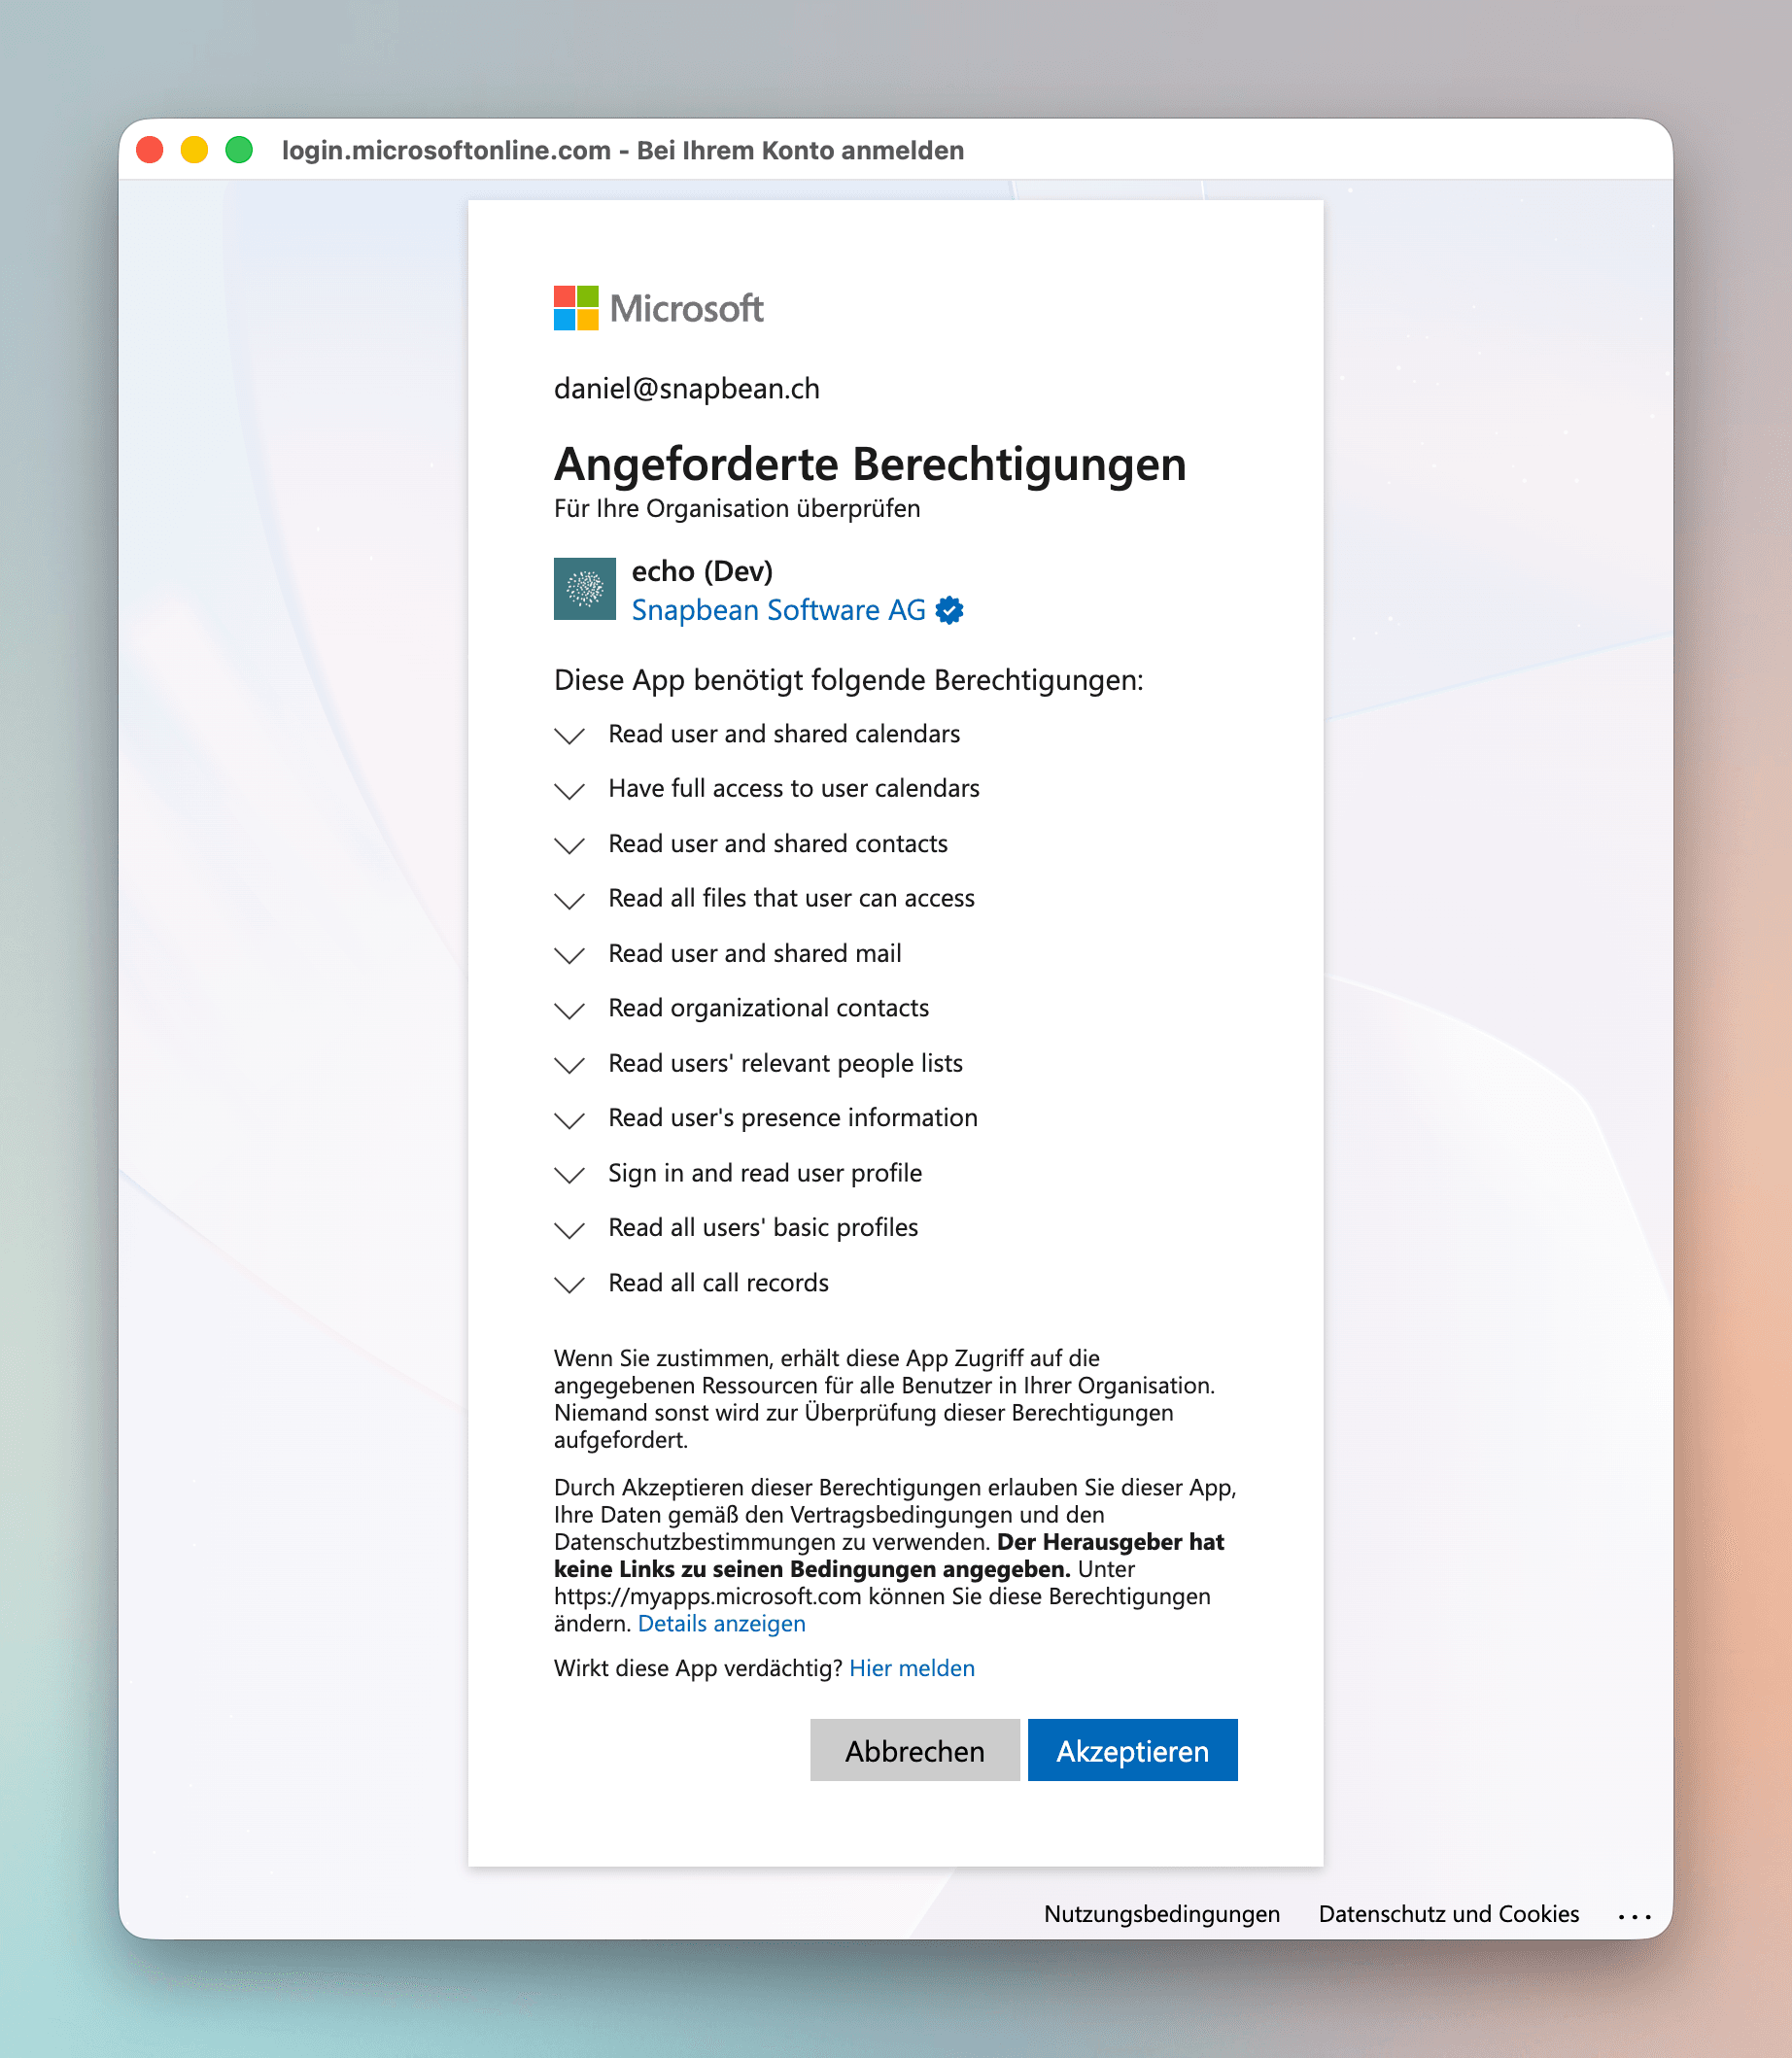
You are redirected to the Microsoft sign-in page. Sign in with your administrator account and review the requested permissions. echo needs this access in order to display contact information for incoming calls. Confirm with “Accept”.
Enterprise Applications.Configure integrations
Depending on which integrations you selected in step 2, they must now be configured with the respective connection details. The settings are available at any time later under Settings → Integrations.
For the following integrations you will find a dedicated step-by-step guide:
AConfigure Abacus · echo-Data-source-AbacusTenant connection (organization-wide) and user connection including the required API scopes.→CConfigure CMI · echo-Data-source-CMIEntering the API, STS and portal URL to connect your CMI cloud environment.→ACConfigure ActiveCampaign · echo-Data-source-ActiveCampaignOrganization-wide connection via API URL and API key, optionally with a web URL for direct links.→PConfigure Pipedrive · echo-Data-source-PipedriveConnect from echo or Pipedrive to identify incoming callers using your Pipedrive contacts.→Telephony integration: live caller identification & Windows client
Live caller identification shows you a caller’s contact details in an additional window – even before you answer the call. For echo to display this information before a call is answered, a client application is required that must be installed on all computers that use echo.
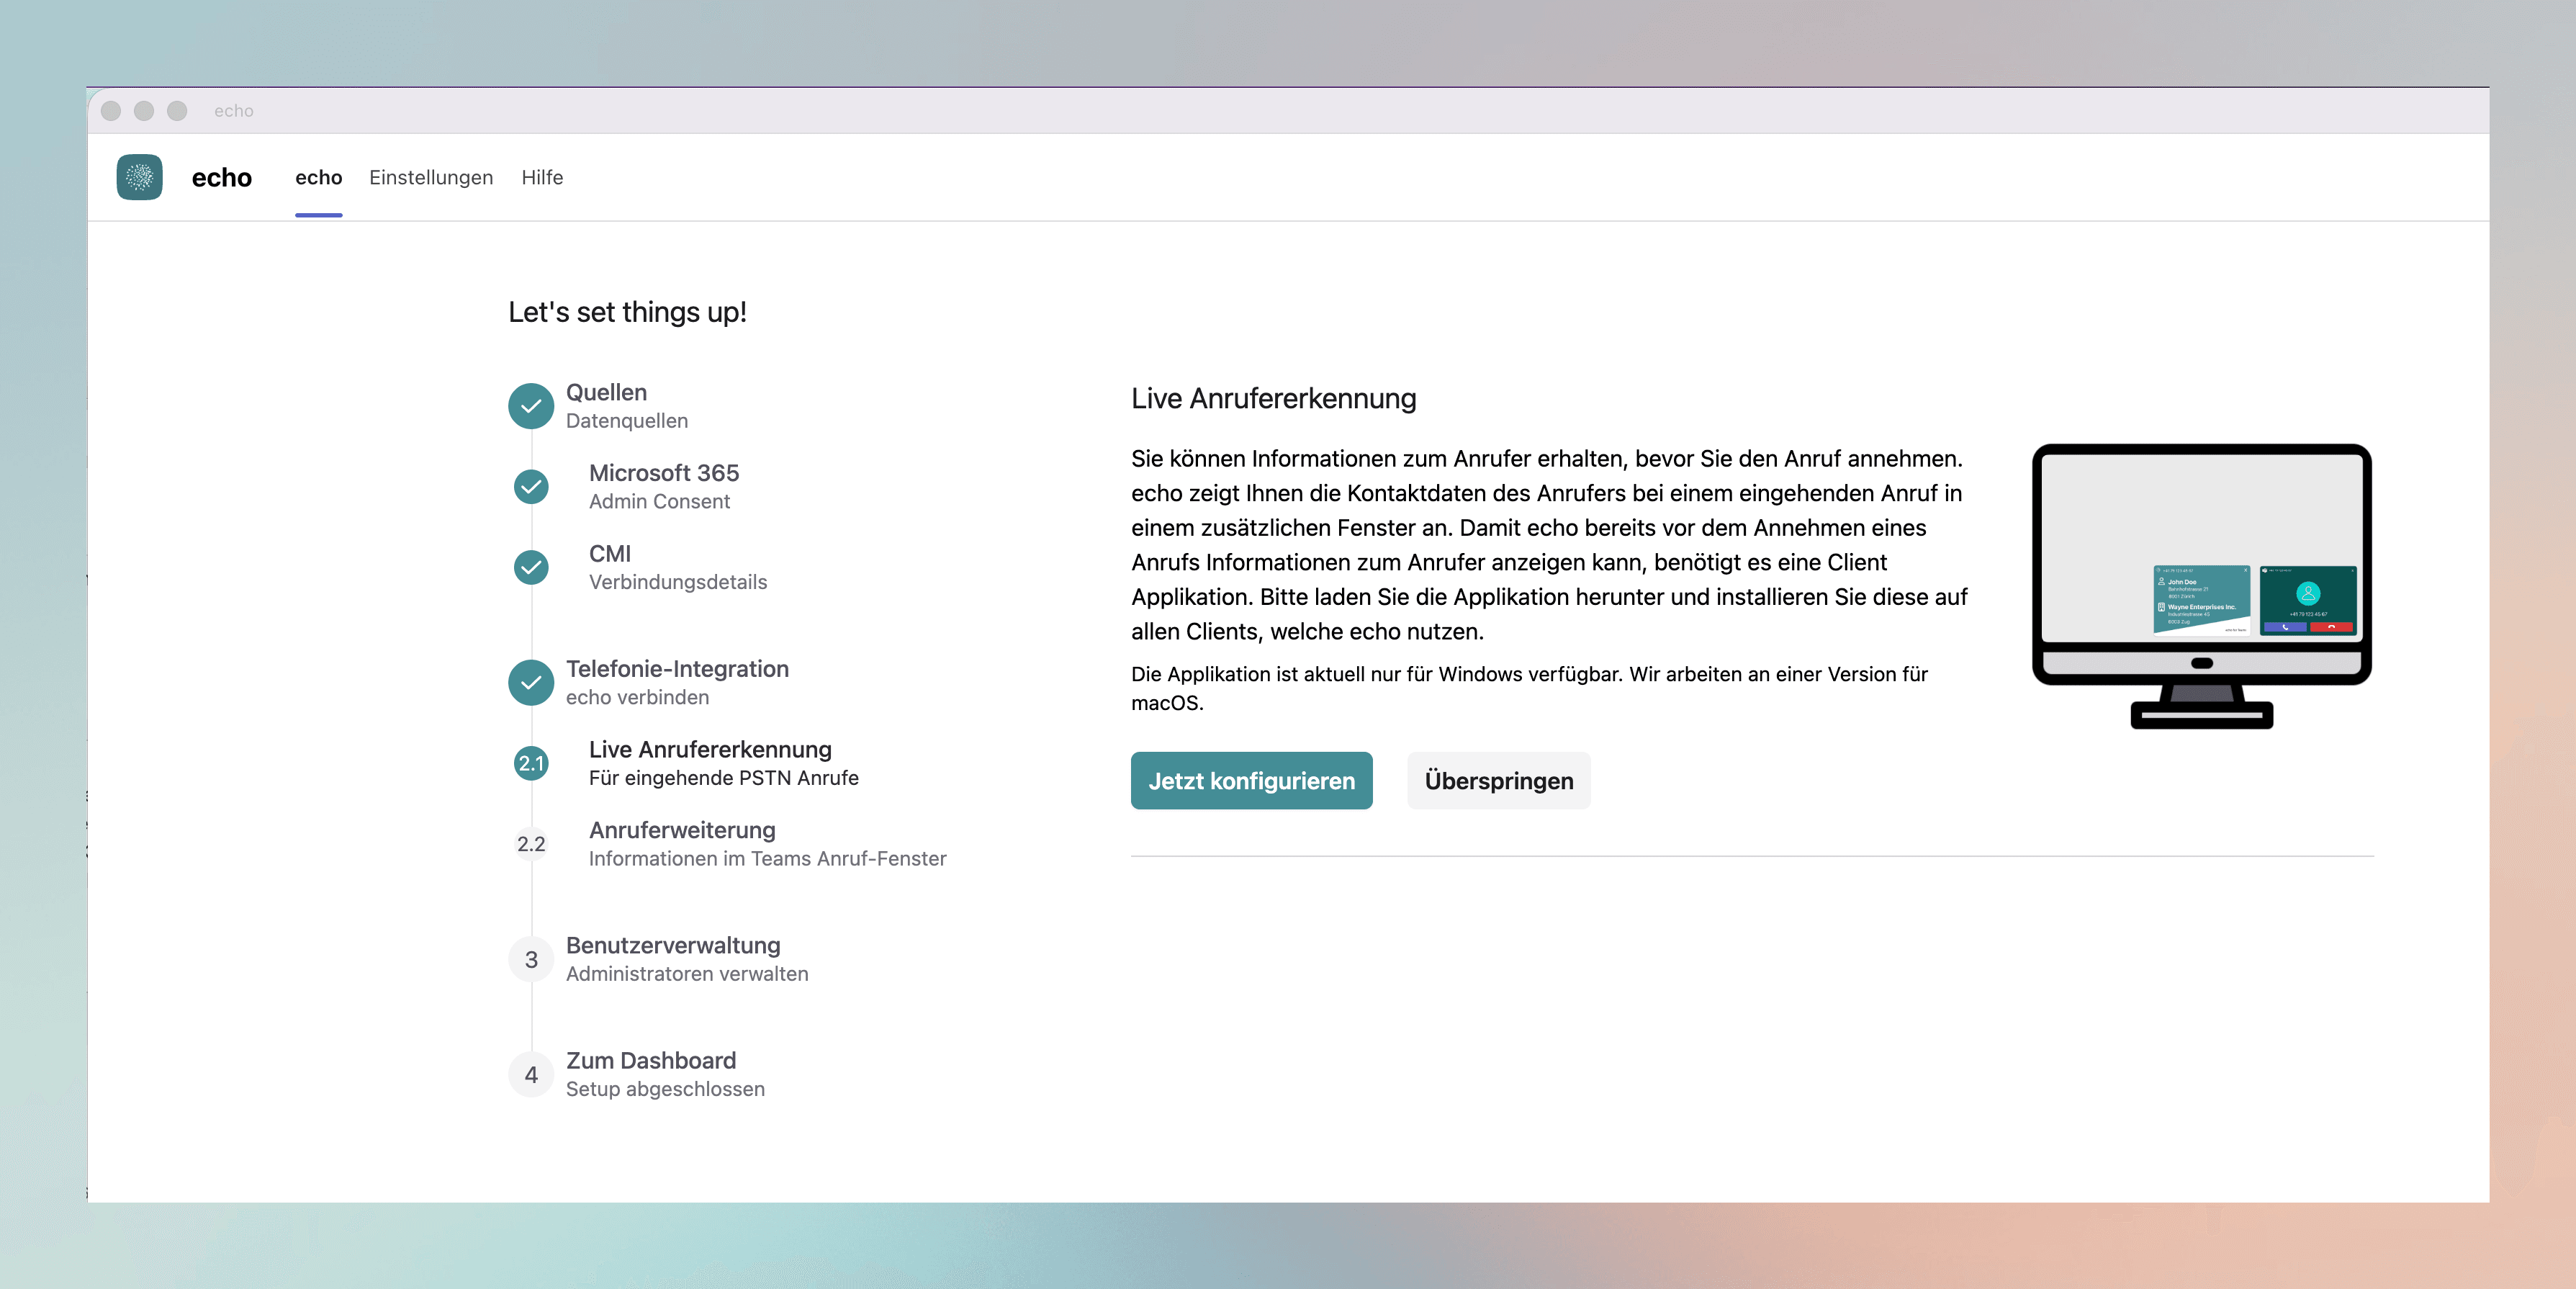
Distribute the Windows client – step by step
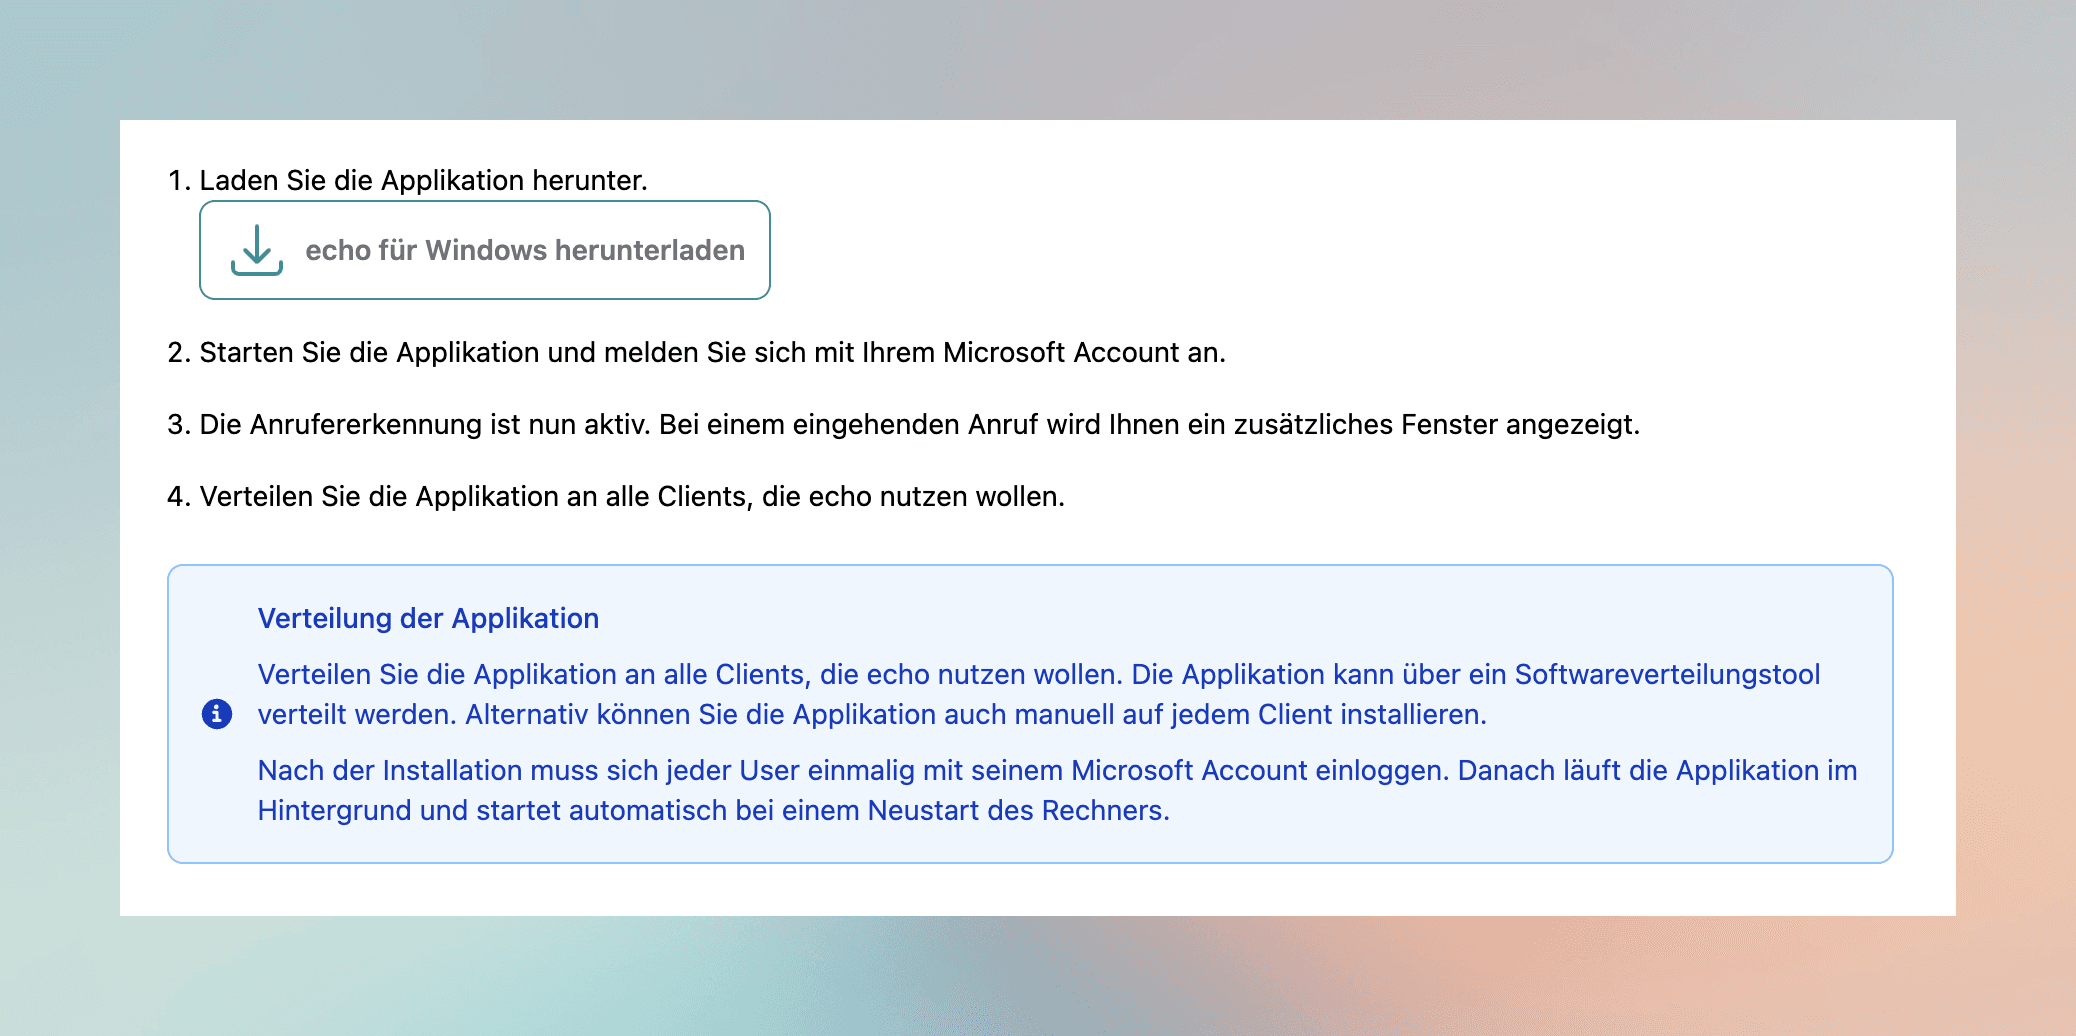
- Download the application – Download the echo Windows client via “Download echo for Windows”.
- Install & sign in – Start the application and sign in with your Microsoft account.
- Caller identification becomes active – On an incoming call, the additional window with the caller information is shown.
- Distribute to all clients – Distribute the application to all computers that should use echo.
If telephony integration is not relevant at this time, you can skip the step via “Skip” and catch up later.
Manage administrators
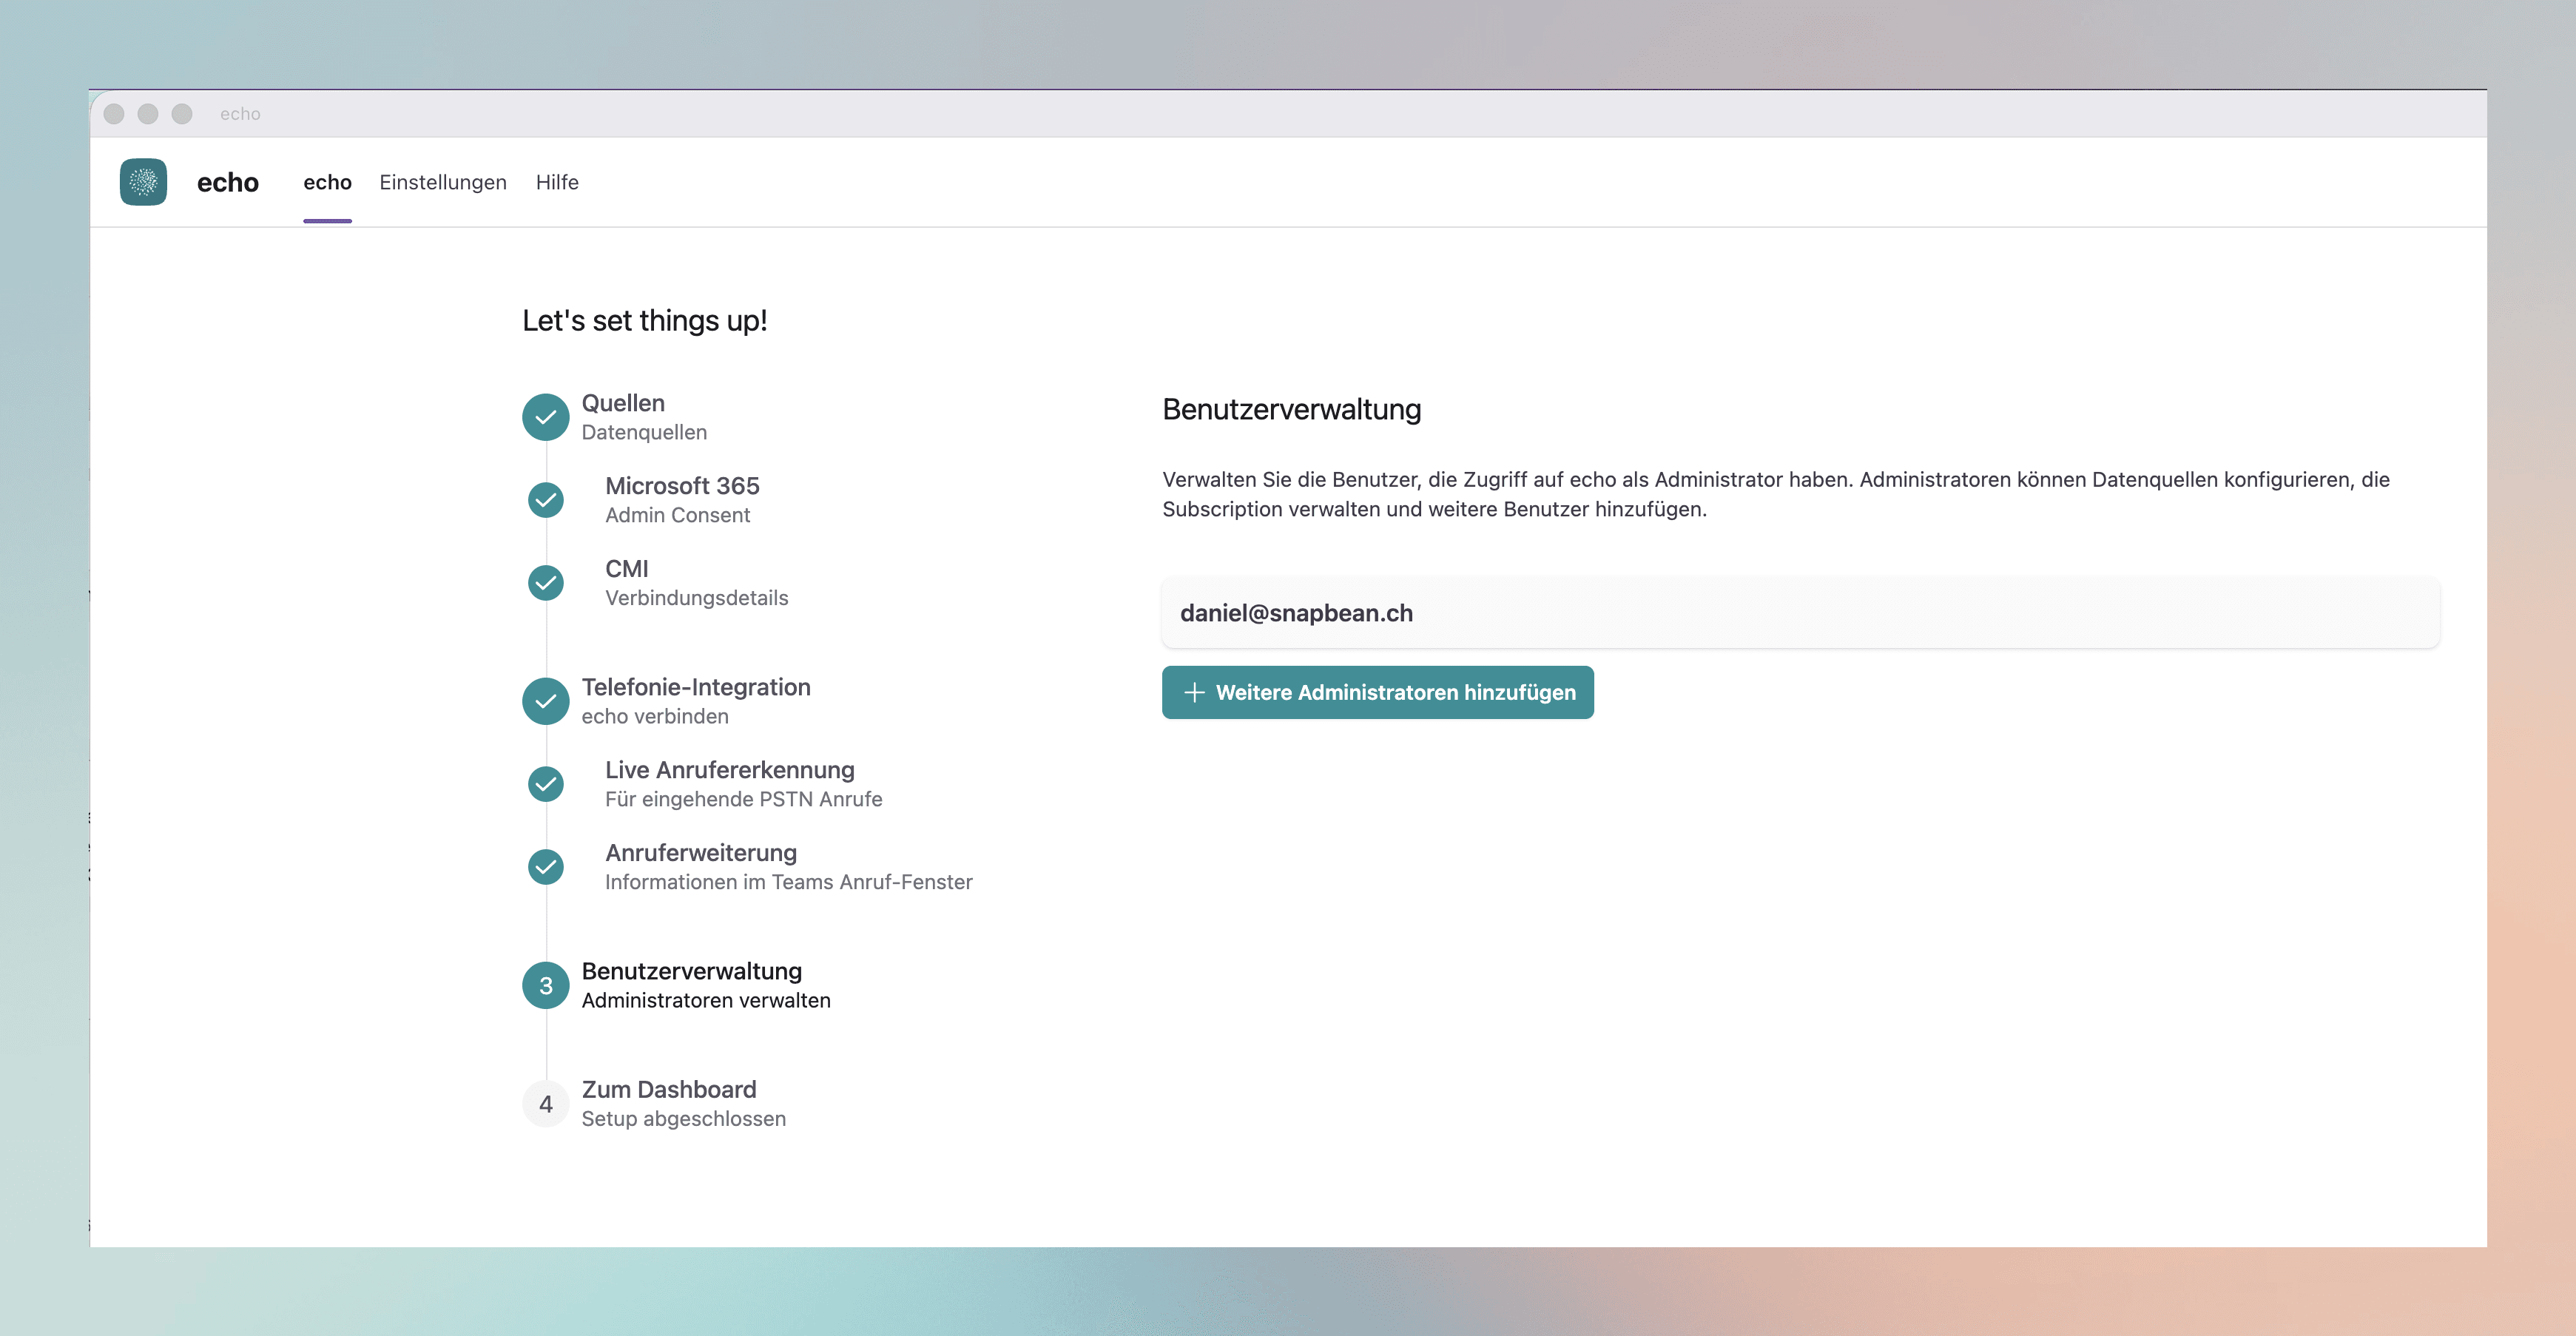
In the User management step you define which users may access echo as an administrator. Administrators can configure integrations, manage the subscription and add more users.
Your own account is already entered as an administrator. Via “Add more administrators” you add additional people.
Complete setup
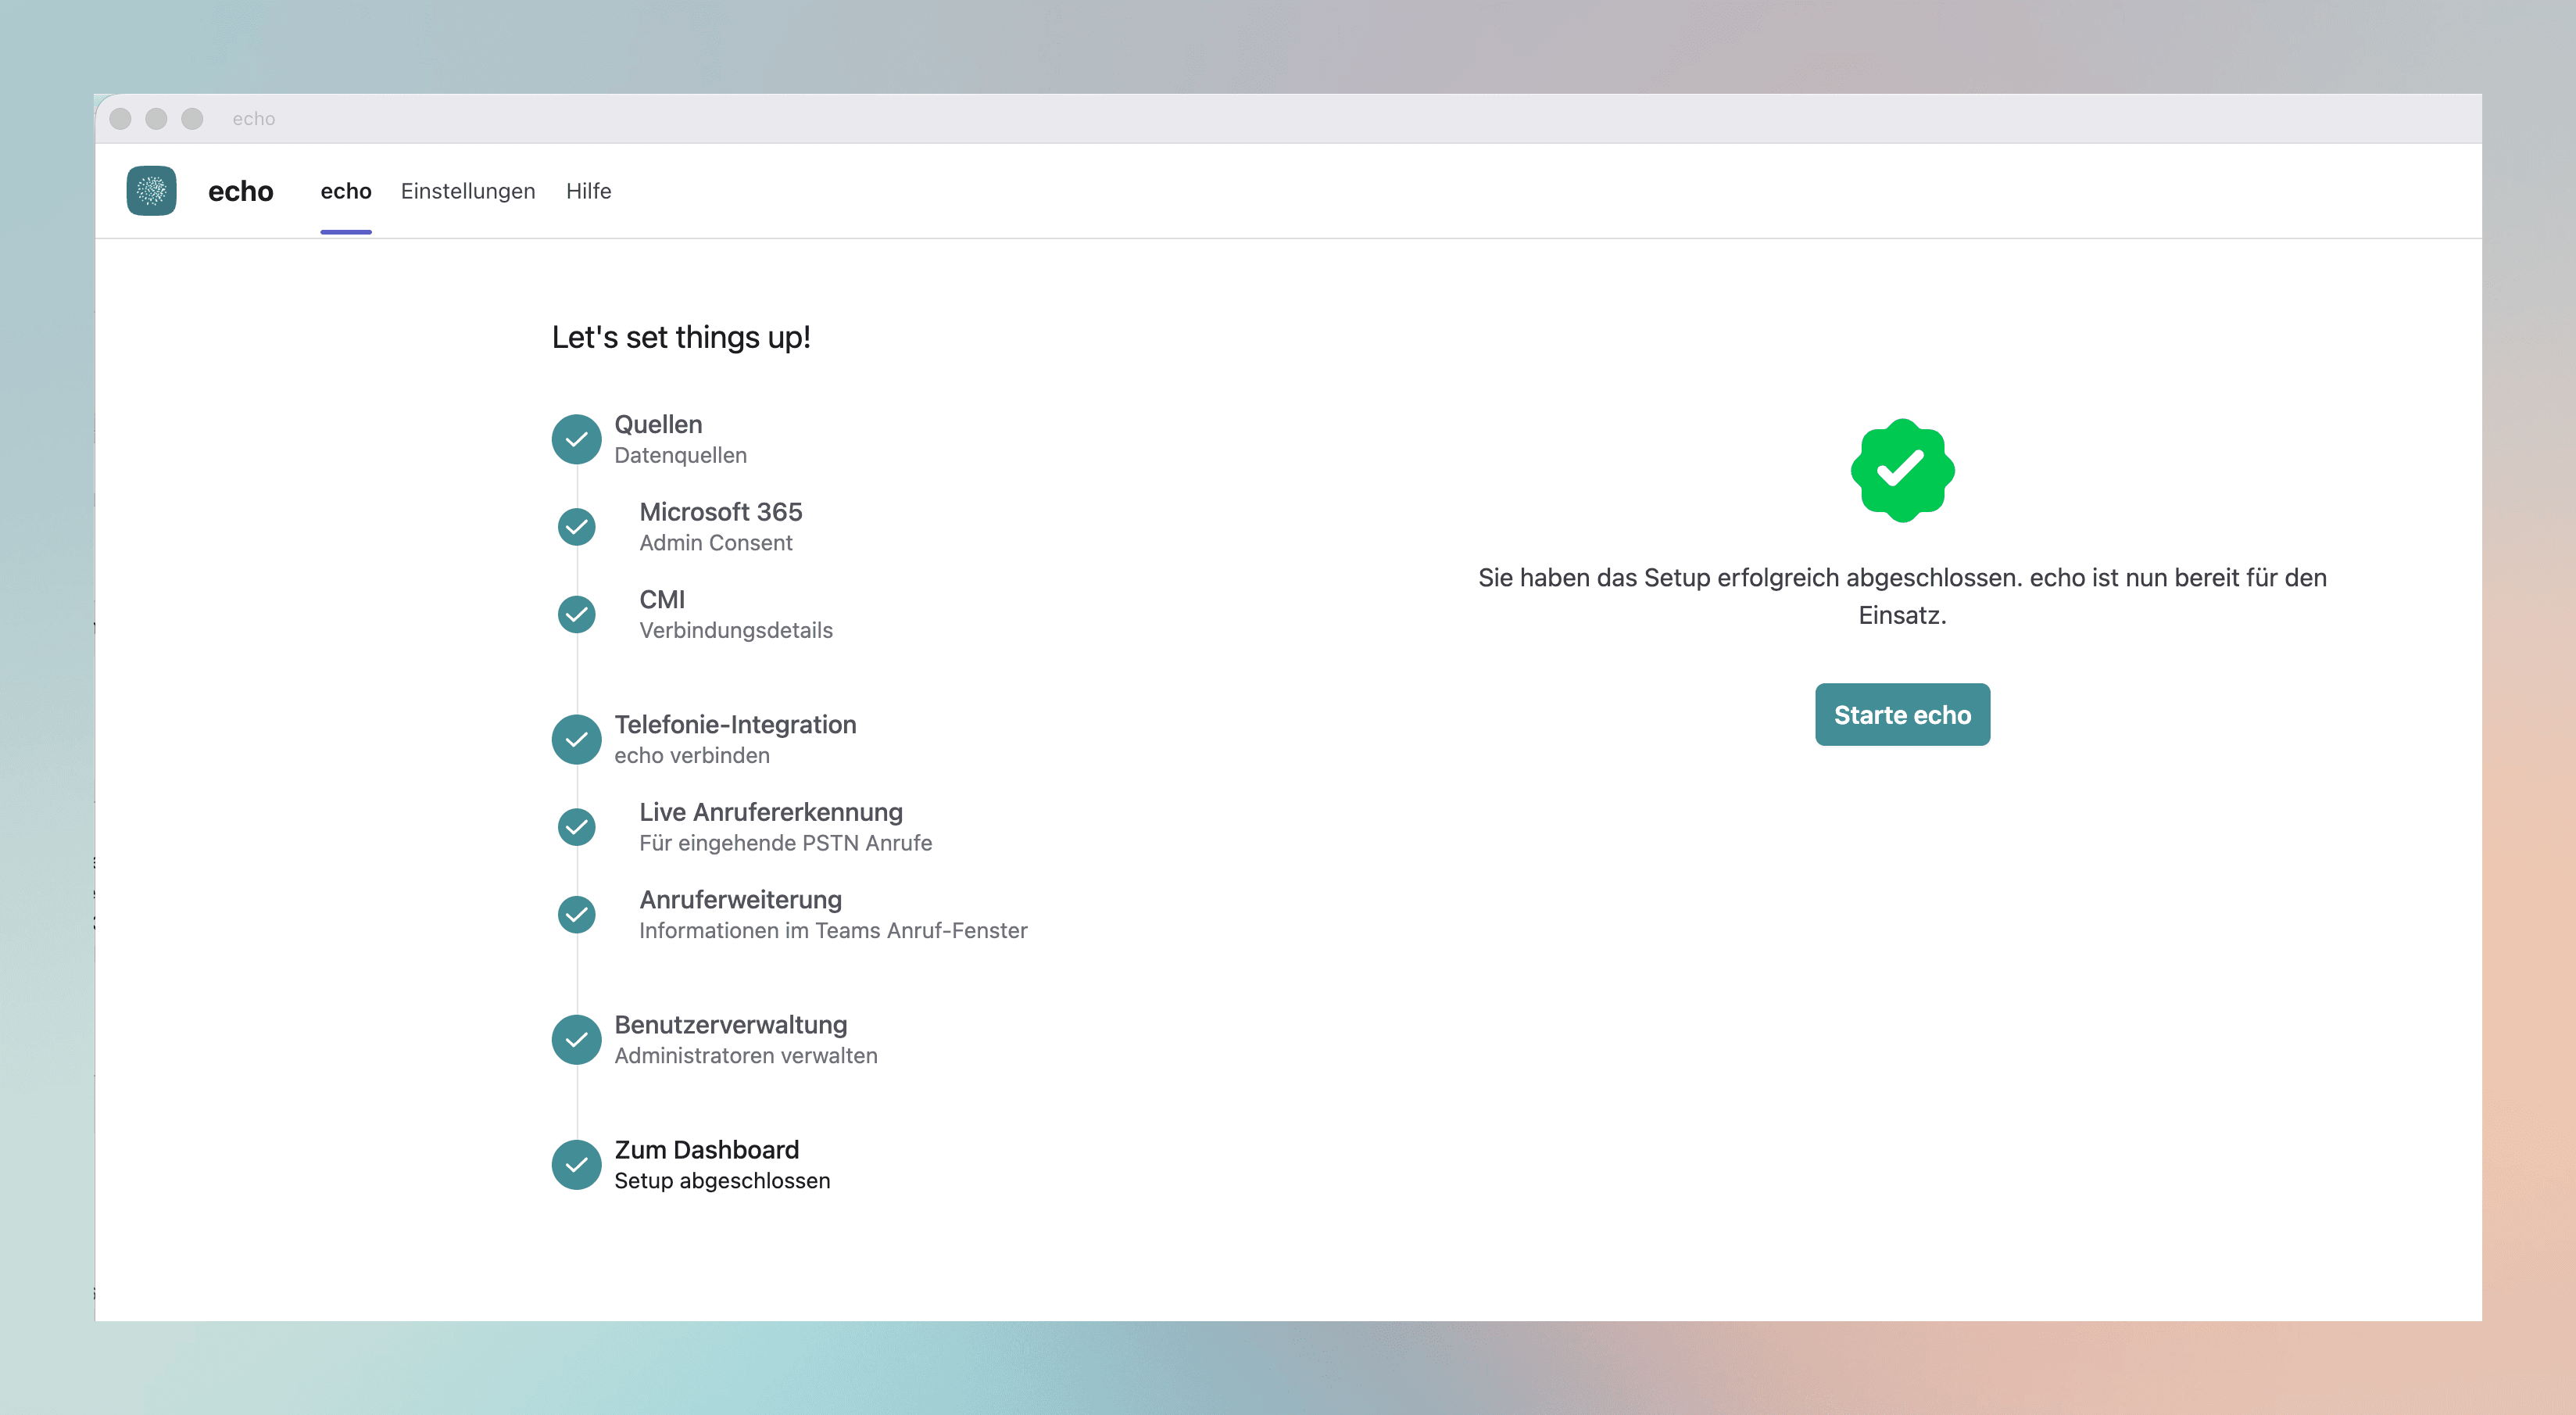
Once all steps are completed, echo confirms the successful setup. All items in the progress bar are now marked with a green checkmark. echo is now ready for use.
Click “Start echo” to reach the dashboard.
What’s next?
The organization-wide initial setup is now complete. The following parts of this documentation will cover:
- Per-user setup – installation and sign-in of the Windows client by individual end users.
- Settings explained (Admin) – detailed description of all administrative settings.
- Settings explained (User) – personal settings and options for end users.